


88 • Scanning to the Network (SCAN mode) XEROX WIDE FORMAT COPY SYSTEM
are also deleted when the age of the file exceeds the value
set in the timer. Refer to “Timers” in the “Main Menu”
section to set this value. The factory default is 24 hours.
Selections disabled in SCAN mode
Certain selections available in COPY mode are not available in SCAN
mode. The unavailable selections are:
• Sets Build - In Scan-to-Net mode each document has a
separate image stored on the disk. Scan-to-FTP images are not
stored on the disk. Each image is separately retrieved at the
remote device. Images cannot be grouped in sets.
• Specifying the media Source and Type – Since the output is
now an electronic file, specifying the media is not applicable.
• Specifying the output format – The image file always has the
format of the length of the document by the scan width. The
scan width can be manually specified if the entire width of the
document is not desired. Refer to “Scan System Control” in the
“Main Menu” section to enable or disable manual specification of
the scan width.
• Selection of Margins or Justification – You can crop equal
amounts from each side edge of the document by manually
specifying a scan width that is narrower than the actual
document. Refer to “Scan System Control” in the “Main Menu”
section to enable or disable manual specification of the scan
width.
• Specification of Finishing Options – Since there is no physical
output, the finishing operations are not applicable.
• Selection of Reduce/Enlarge - The electronic file is saved
without alteration, so all scanned information is preserved.
• Selection of Image Type. Only Line, Photo, Normal, and Color
image types are valid for SCAN mode. Refer to the “Image
Quality”, “Scan Mode” section in this manual for additional
information
• Background Suppression - This selection is automatically
switched to OFF if a color printer is connected.
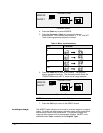
Operating in SCAN mode
To scan documents for later retrieval over the network:
1. If job accounting is enabled, enter in your User ID and Account
ID when prompted and press
Enter. If job accounting is not
enabled, you will not have to enter your IDs.
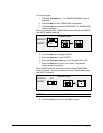
2. If you want to see a preview of the scanned images when they
are retrieved from the Controller to your workstation, verify that
the Scan System’s default “PREVIEW” box is checked when
selecting the
Original, Type. Use the Previous, Next, and
Enter keys to enable PREVIEW. Use the Enter key to confirm
your choice(s).