


44 • Image Quality XEROX WIDE FORMAT COPY SYSTEM
• View the saved document file format for Photo mode. The
format is 8 bit TIFF.
NOTE: This option will not be displayed unless the Scan-to-Net feature
is enabled. To order this feature, contact your XEROX representative.
NOTE: The Background Suppression option cannot be used with the
Photo setting. If Photo is selected, Background Suppression is
automatically set to Off.
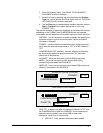
1. Enter the SCAN mode by pressing the Mode key, then entering
the Directory Name and pressing the Enter key.
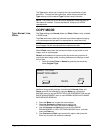
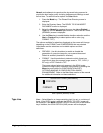
2. Select Photo by pressing the arrow key below Original, Type
key. The screen shown below is displayed.
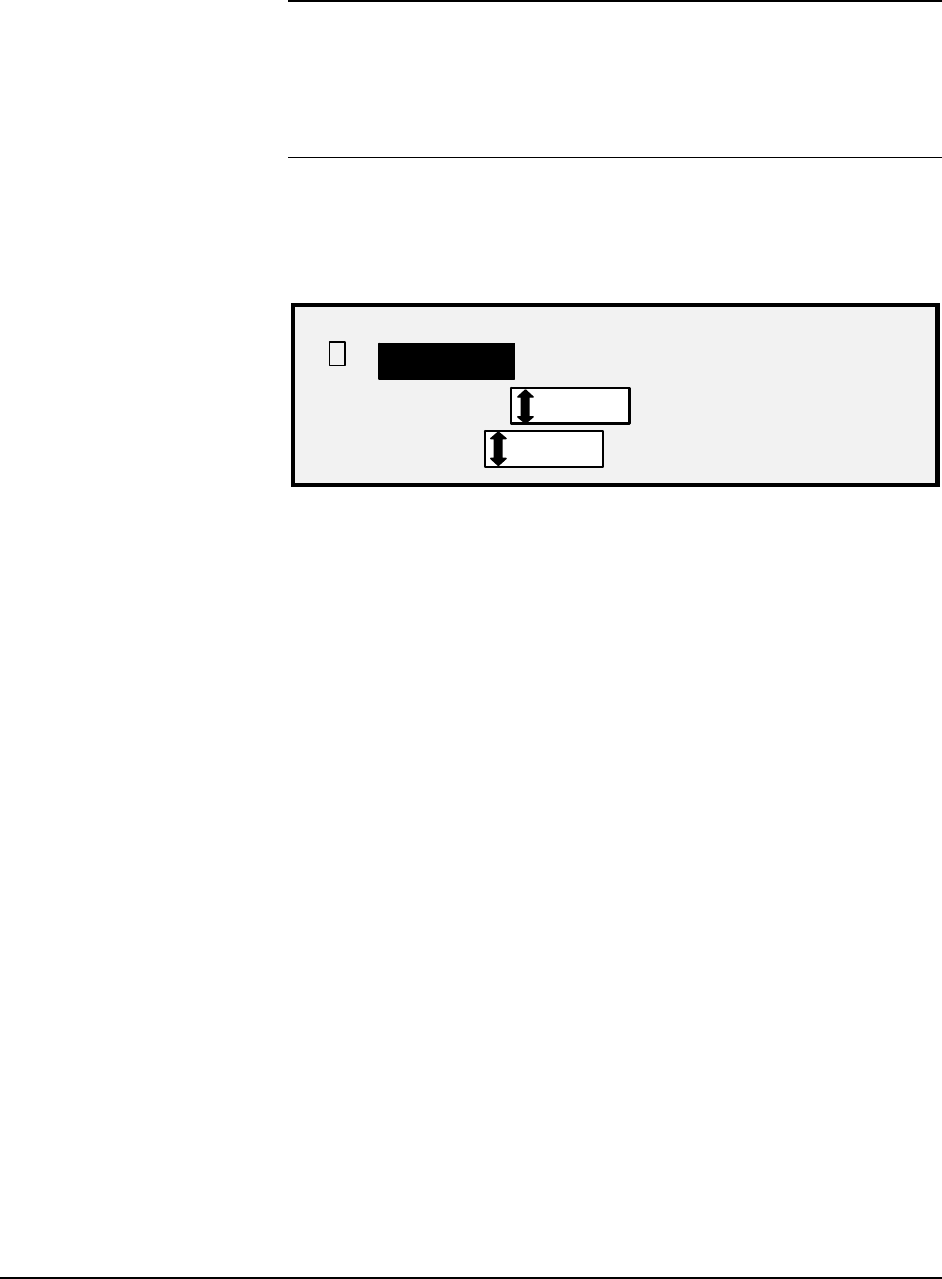
SCAN OPTIONS (PHOTO)
COMPRESSION:
FORMAT:
RAW
TIFF
PREVIEW
9
Scan Options (Photo) Screen
3. Press the Previous or Next key to highlight the scan option you
wish to change.
Do one of the following:
• For PREVIEW, press the Enter key to enable or disable the
option. A checkmark appears in the box to the left of the
option when the option is enabled. The factory default
setting is enabled.
• For COMPRESSION, press the Previous or Next key to
highlight the desired setting. Then press the Enter key to
select the highlighted format. The choices are RAW and
PACKBITS. The factory default setting is RAW.
4. For FILE FORMAT, the only selection is TIFF. Repeat steps 3
and 4 to change the remaining setting, if desired.
5. Press the Enter key to confirm the selection.
6. Press the Exit key to return to the Ready screen.
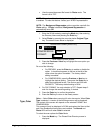
Color — Select Color when scanning full color documents. When Color
Type is selected, a version of the following screens will be displayed.
The content of the screen will depend on the selected FORMAT and
COMPRESSION.
This screen will only be displayed in SCAN mode when the Scan-to-Net
and Color Enablement feature keys are installed. The Normal and
Photo LEDs will be lit when Color is selected.
To select the scan options for Color Mode:
1. Press the Mode key. The Please Enter Directory screen is
displayed.
Type, Color