


XEROX WIDE FORMAT COPY SYSTEM Special features keys • 77
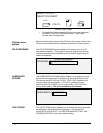
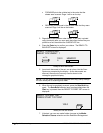
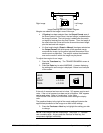
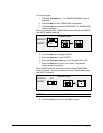
Scanner
Left image
d
Right image
d
Trail
d
Lead
d
Image Entering the Scan System Diagram
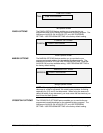
Margins are added to the image in one of two ways:
• If Synchro has been selected from the Output Format area of
the Scan System Control Panel, the lead margin is added before
the image is printed. The trail margin is added after the media
cut signal is received from the Scan System. Thus, the length of
the media from the Printer will be the scanned document length
plus the lead and trail margins.
• If a fixed media length (Preset or Manual) has been selected as
the
Output Format, the white space of the specified margin
surrounds the image, but the actual physical dimensions of the
media remain as specified. The margins reduce the allowable
area on the media in which the image may be placed.
To adjust the margins for an image:
1. Press the
Transform key. The TRANSFORM MENU screen is
displayed.
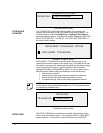
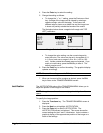
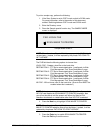
2. Press the
Enter key to select MARGINS. A screen displaying
the settings for each margin is displayed. Below is an example
of the screen.
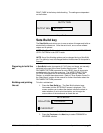
LEAD + 1.0 IN
LEFT + 0.0 IN
RIGHT + 0.0 IN
TRAIL + 0.0 IN
Margins Selection Screen in Transform Menu
If the unit of measure has been set to inches, “IN” appears next to each
value. If the unit of measure has been set to millimeters, “MM” appears
next to each value. Refer to “Localization” in the “Main
CONFIGURATION “section for information about setting the display
units.
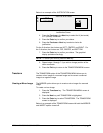
The graphical display to the right of the margin settings illustrates the
approximate placement of the image as a result of the settings.
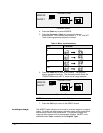
3. Press the
Previous or Next key to highlight the setting you wish
to change.
NOTE: Each margin has two components. They are a “+/-“ indicator
and a numeric value. As you press the Previous or Next key, the
components highlight individually.