


100 • Main Menu XEROX WIDE FORMAT COPY SYSTEM
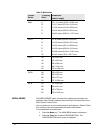
NOTE: The formats are expressed in the units of measurement selected
for the machine. Refer to "Localization" in the "Main Menu" section for
further information.
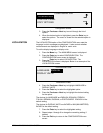
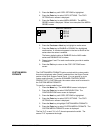
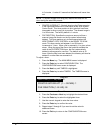
Below is an example of the MEDIA SERIES screen. In the example, the
display units have been set to inches.
CUSTOM MEDIA FORMATS (IN)
0.0 X 0.0
0.0.X 0.0
0.0 X 0.0
0.0.X 0.0
0.0 X 0.0
0.0.X 0.0
Custom Media Formats Screen
7. Press the
Previous or Next key to highlight the desired field.
8. Use the numeric keypad to enter the value for the highlighted
field.
9. Widths in excess of 36 inches (914 mm) or less than 11 inches
(297 mm) are not valid.
10. Press the
Enter key to confirm the value.
11. Repeat steps 7 through 9 until all desired formats are defined.
NOTE: Any custom formats that are not defined are automatically set to
zero and are not displayed elsewhere.
12. Press the Exit key to return to the COPY OPTIONS menu
screen.
The CUSTOM R/E PRESETS option controls which
reduction/enlargement ratios are displayed when Preset is selected from
the Reduction/Enlargement portion of the Scan System Control Panel.
You can specify up to six reduction/enlargement presets.
To specify a reduction/enlargement preset:
1. Press the
Menu key. The MAIN MENU screen is displayed.
2. Press the
Enter key to select CONFIGURATION. The
CONFIGURATION menu screen is displayed.
3. Press the
Next key until COPY OPTIONS is highlighted.
4. Press the
Enter key to select COPY OPTIONS. The COPY
OPTIONS menu screen is displayed.
5. Press the
Next key until CUSTOM R/E PRESETS is highlighted.
6. Press the
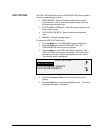
Enter key to select CUSTOM R/E PRESETS. The
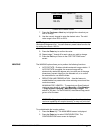
CUSTOM R/E PRESETS screen is displayed. Below is an
example of the CUSTOM R/E PRESETS screen.
CUSTOM R/E PRESETS