


102 • Main Menu XEROX WIDE FORMAT COPY SYSTEM
3. Press the Next key until COPY OPTIONS is highlighted.
4. Press the
Enter key to select COPY OPTIONS. The COPY
OPTIONS menu screen is displayed.
5. Press the
Next key until IMAGING is highlighted.
6. Press the
Enter key to select IMAGING. The IMAGING screen
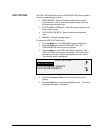
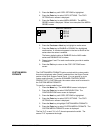
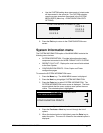
is displayed. Below is an example of the IMAGING screen.
IMAGE ENHANCEMENT
COLOR IQ: SRGB
IMAGING
AUTO-ROTATE
MAXIMUM COPY LENGTH: 1200.0 IN
9 REDUCTION LINE PRESERVATION
Imaging Screen
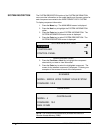
7. Press the
Previous or Next key to highlight the desired option.
8. Press the
Enter key to enable or disable the highlighted option.
A checkmark appears in the box to the left of the option when the
option is enabled.
The factory default setting is disabled for AUTO-ROTATE.
9. Repeat steps 7 and 8 to enable or disable REDUCTION LINE
PRESERVATION, if desired.
10. Press the
Exit key to return to the COPY OPTIONS menu
screen.
The IMAGE ENHANCEMENT feature settings are used to enhance the
appearance of color scanned images, particularly halftone color originals
(for example, maps).
This feature will greatly enhance the printing of a color sample using the
Color Scan-to-Print feature key.
To enable the IMAGE ENHANCEMENT features, perform the following:
1. Select the
Menu key.
2. Press the
Enter key to select CONFIGURATION. The
CONFIGURATION menu screen is displayed.
3. Press the
Next key until IMAGE ENHANCEMENT is highlighted.
4. Press the
Enter key to select IMAGE ENHANCEMENT. The
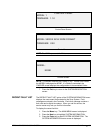
IMAGE ENHANCEMENT menu screen is displayed.
5. Press the
Next key to highlight COLOR IQ.
6. Press the
Enter key to select COLOR IQ. The COLOR IQ screen
is displayed.
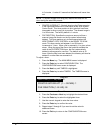
IMAGE ENHANCEMENTS