Fax
WorkCentre 7425/7428/7435
System Administrator Guide
143
Connecting the Phone Line
• LINE 1 Connect the fax to a public switched telephone network (PSTN). An external telephone
cannot be connected.
• TEL An external telephone is connected here.
• LINE 2 (Line 2) Connect to a public line.
• LINE 4 (Line 4) Connect to a public line.
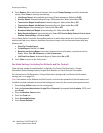
Local Terminal Information Settings
1. Press the Log In/Out button on the control panel.
2. Enter the System Administrator’s Login ID and Passcode if prompted (default admin, 1111), and
press Enter.
3. Press the Machine Status button.
4. Touch the Tools tab.
5. Touch Fax Mode Settings.
6. Touch Local Terminal Information.
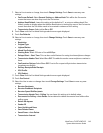
7. Select the items to enter information and touch Change Settings.
a. Enter a Local Name, up to 20 characters, then touch Save.
b. Enter a Company Logo, up to 30 characters, then touch Save.
c. Enter a Machine Password, up to 20 digits, then touch Save.
Note: The password prevents your machine from receiving faxes, or being polled by other machines
that are not F-Code compatible.
d. Enter G3 Fax ID, up to 20 digits, then touch Save.
e. Enter G3 Dial Type, Tone, 10pps, or 20pps, then touch Save.
f. Enter G3 Line Type, PSTN or PBX, then touch Save.
8. When complete, touch Close repeatedly until the Tools screen is displayed.
9. Wait several seconds for the Auto Clear service to log you out.
Address Book Setup
Use of this feature enables Fax users to select recipients by 3 digit numbers, which can be used to
support speed dialing.
1. Press the Log In/Out button on the control panel.
2. Enter the System Administrator’s Login ID and Passcode if prompted (default admin, 1111), and
press Enter.
3. Press the Machine Status button.
4. Touch the Tools tab.
5. Select Setup & Calibration.
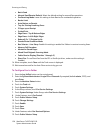
6. Touch Add Address Book Entry.
7. Select an available Address Number.
8. Touch Create/Delete.


