


ES-2024 Series User’s Guide
Chapter 7 Basic Setting 76
Flow Control A concentration of traffic on a port decreases port bandwidth and overflows buffer
memory causing packet discards and frame losses. Flow Control is used to regulate
transmission of signals to match the bandwidth of the receiving port.
The switch uses IEEE 802.3x flow control in full duplex mode and backpressure flow
control in half duplex mode.
IEEE 802.3x flow control is used in full duplex mode to send a pause signal to the
sending port, causing it to temporarily stop sending signals when the receiving port
memory buffers fill.
Back Pressure flow control is typically used in half duplex mode to send a "collision"
signal to the sending port (mimicking a state of packet collision) causing the sending
port to temporarily stop sending signals and resend later. Select Flow Control to
enable it.
802.1P Priority This priority value is added to incoming frames without a (802.1p) priority queue tag.
See Priority Queue Assignment in Table 10 on page 71 for more information.
PD This field is only available on the ES-2024PWR but not available for the Gigabit or
mini-GBIC ports.
A powered device (PD) is a device such as an access point or a switch, that supports
PoE (Power over Ethernet) so that it can receive power from another device through a
10/100Mbps Ethernet port.
Select the check box to allow a powered device (connected to the port) to receive
power from the switch.
PD Priority This field is only available on the ES-2024PWR but not available for the Gigabit or
mini-GBIC ports.
When the total power requested by the PDs exceeds the total PoE power budget on
the switch, you can set the PD priority to allow the switch to provide power to ports
with higher priority.
Select Critical to give the highest PD priority on the port.
Select High to set the switch to assign the remaining power to the port after all critical
priority ports are served.
Select Low to set the switch to assign the remaining power to the port after all the
critical and high priority ports are served.
Apply Click Apply to save your changes to the switch’s run-time memory. The switch loses
these changes if it is turned off or loses power, so use the Save link on the top
navigation panel to save your changes to the non-volatile memory when you are done
configuring.
Cancel Click Cancel to reset the fields to your previous configuration.
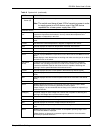
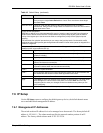
Table 12 Port Setup (continued)
LABEL DESCRIPTION