


Windows NT 3.51 33
4 Click Add Adapter.
The Add Network Adapter screen appears.
5 Open the Network Adapter Card list box, and then scroll and select
<Other> Requires disk from manufacturer.
6 Click Continue.
The Insert Disk screen appears.
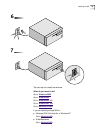
7 Insert the EtherCD in the CD-ROM drive, make sure that the correct path to your
CD-ROM drive appears in the entry box, and then click OK.
The Select OEM Option screen appears.
8 Make sure that the 3Com NIC is selected, and then click OK.
Files are copied.
The Network Settings screen appears. Make sure that the name of the installed
NIC appears in the list of installed adapter cards and that it is selected.
9 Click OK.
The TCP/IP Configuration screen appears.
10 Assign an IP address to your PC.
There are two ways to assign an IP address: automatically or manually. Your
network administrator will specify which method to use, and if required, provide
an IP address for you to use.
■ To obtain an IP address automatically (this method requires an active
connection to a DHCP server):
Make sure that the correct NIC name is displayed and selected.
a Select the Enable Automatic DHCP Configuration check box.
b Click Yes to the Windows NT confirmation screen that appears, and then
click OK.
The Network Settings Change screen appears, prompting you to restart
your computer.
c Remove the EtherCD from the CD-ROM drive, and then click Restart Now.
The NIC is installed and TCP/IP is configured.
The installation is complete. To confirm that the installation was successful
Go to: V
erifying Successful Installation.
■ To specify an IP address manually:
a Type the IP address, subnet mask address, and default gateway address in their
respective entry fields.
b Click OK.
You are prompted to restart your PC.
c Remove the EtherCD from the CD-ROM drive, and then click Restart Now.
The NIC is installed and TCP/IP is configured. The installation is complete. To
confirm that the installation was successful
Go to: V
erifying Successful Installation.