


76 APPENDIX D: UNINSTALLING NIC SOFTWARE
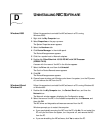
Windows NT 4.0 Follow this procedure to uninstall the NIC software in a PC running
Windows NT 4.0:
1 Double-click the My Computer icon, the Control Panel icon, and then the
Network icon.
The Network screen appears.
2 Click the Adapters tab.
3 Select the name of the NIC in the Network Adapters box, and then click Remove.
4 Click Yes to confirm the removal.
5 Click Close to close the Network screen.
Windows prompts you to restart the computer.
■ If you are physically removing the NIC from the PC, click No. Do not restart the
PC until you shut down the system, turn the power off, and remove the NIC
from the PC.
■ If you are reinstalling the NIC software, click Yes to restart the PC.
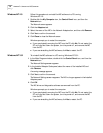
Windows NT 3.51 To uninstall the NIC software in a PC running Windows NT 3.51:
1 In the Main Program window, double-click the Control Panel icon, and then the
Network icon.
The Network Settings screen appears.
2 In the Installed Adapter Cards panel, select the name of the installed NIC and
click Remove.
A warning message appears.
3 Click Yes to confirm the removal.
The Network Settings screen reappears. The NIC no longer appears in the Installed
Adapters panel.
4 Click OK.
The NIC driver and diagnostics software are removed from the PC.
Windows prompts you to restart the computer.
■ If you are physically removing the NIC from the PC, click No. Do not restart the
PC until you shut down the system, turn the power off, and remove the NIC
from the PC.
■ If you are reinstalling the NIC software, click Yes to restart the PC.