4-1
4 INITIAL CONFIGURATION
The 3Com Outdoor 11a Building to Building Bridge and 11bg Access Point offers
a variety of management options, including a web-based interface.
The initial configuration steps can be made through the web browser interface.
The access point requests an IP address via DHCP by default. If no response is
received from the DHCP server, then the access point uses the default address
169.254.2.1.
If the default AP configuration does not meet your network requirements, or if
you want to customize the settings for your own network, you can use these
tools to change the configuration:
1 Launch the 3Com Wireless Infrastructure Device Manager (Widman) utility
2 Directly connect to the device through it’s Ethernet port or console port
NETWORKS WITH A DHCP SERVER
If your network has a DHCP server, an IP address is automatically assigned to the
AP. It takes between one and two minutes for the Access Point to determine if
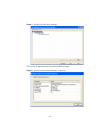
there is a DHCP server on the network. Use the 3Com Wireless Infrastructure
Device Manager (Widman) included on the 3Com Installation CD to locate the
Access Point on the network and view its IP address. After you determine the AP’s
IP address, you can enter that IP address into a web browser on a computer on
the same subnet to view the Access Point’s system status or change its
configuration.
NETWORKS WITHOUT A DHCP SERVER
If your network does not have a DHCP server, the Access Point uses a factory
assigned IP address (169.254.2.1). You can use that IP address to configure the
Access Point, or you can assign a new IP address to the Access Point. To verify that
the Access Point is using the default IP address assigned at the factory:


