CM1164 User Manual
6
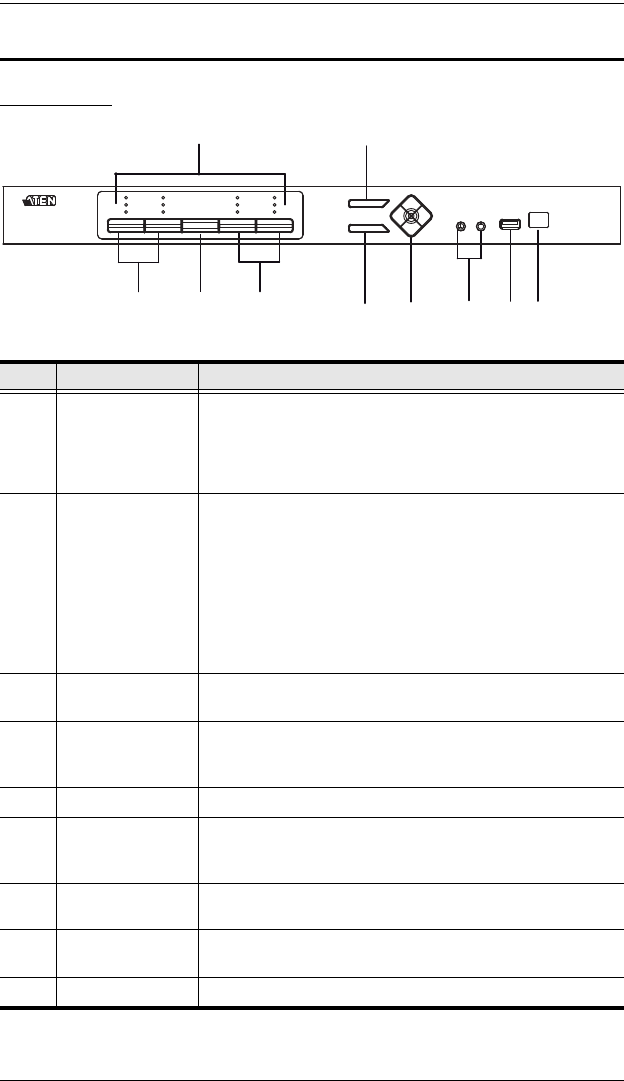
Components
Front View
No. Component Description
1 LED Status Panel This panel contains LED icons that light to indicate mode
and port status. The Mode and Port Selection Pushbuttons
each have three corresponding LED icons that represent
audio, KVM, and USB Link status. See LED Display,
page 16, for full details.
2 Port Selection
Pushbuttons
Press the Port Selection Pushbuttons to manually
switch ports. See LED Display, page 16, for full details.
Press and hold Port Selection Pushbuttons 1 and 2
simultaneously for 2 seconds to start Auto Scan Mode.
See Auto Scanning, page 30, for full details.
Press and hold Port Selection Pushbuttons 3 and 4
simultaneously for 2 seconds to execute a KVM reset.
See KVM Reset, page 26 for full details.
3 Mode Selection
Pushbutton
This pushbutton allows you to cycle through the three
modes of focus – KVM, audio, and USB Link.
4 OSD (Esc) button Press this to invoke the on-screen display (OSD) menu.
When the OSD menu is enabled, press the OSD button to
go back to the previous menu/submenu.
5 Select button Press this to select an option in the OSD menu.
6 Direction /
Function buttons
Use these buttons to switch between Function modes (Fn1
to Fn4), and to cycle through the OSD menu/selection.
See IR Remote Control, page 8 for details.
7 Console Audio
Ports
Your speakers and microphone plug in here.
8 USB 2.0
Peripheral Port
USB 2.0 peripherals (printers, scanners, etc.) plug into this
port.
9 IR Receiver This receives signals from the IR remote control.
1
4
5
2 23
6
7
8
9
cm1164.book Page 6 Thursday, August 16, 2012 4:50 PM


