


Bridging
4-48 Filtering Database
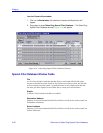
Changing the Receive Port
You can change the Receive port of an address entry in the scrollable panel, so
that a frame must be received at the speciÞed port for the Þltering action to apply.
To do so, click on the Receive port in the panel. With each click, the Receive port
will cycle to the next port (e.g., from
*
(promiscuous), to 1, to 2, to 3, to 4, to 5, up
to 32, back to
*
).
Changing the Port Filtering Action
You can change the Port Filtering action at each bridge port from its current action
to the opposing action.
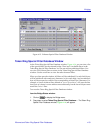
1. Maneuver the scroll bar until the desired port is in the Port Filtering panel.
2. Click on the port to alter its filtering action from forwarding frames from the
associated address (), to filtering frames ( ) (or vice versa).
Adding or Deleting Individual Entries
You can add or delete entries individually from the Filtering Database.
To add an address:
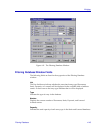
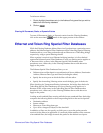
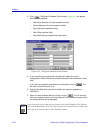
1. Click on the New button in the lower left of the window. A window
(Figure 4-12) will appear.
Figure 4-12. Filter DatabaseÑNew Filter Window
2. In the Filter Address field, type in the address (Hex format) for which you
desire bridging. Be sure to add “-” as a separator between each byte in the
address.
3. In the Receive Port field, type in the port at which the address must be
detected for bridging to take place. If you enter a value of 0 in this field, the
Receive Port is considered promiscuous (i.e., any port), and will be
designated by an “
*”
in the Address Entry panel.
4. Click on .
5. Specify the Port Filtering action on the address entry as described in the
previous section.