Using the Dell Server Assistant CD 2-15
Chapter 2
Using the Dell Server Assistant CD
This chapter describes the bootable Dell Server Assis-
tant CD and tells you how to use the utilities, diagnostics,
documentation, drivers, and other items included on the
CD. This chapter also describes how to install the video
drivers for supported operating systems and how to use
the asset tag utility provided on the CD.
Booting the CD
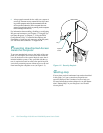
The system must be running to insert the CD. To boot
the CD, insert it into the PowerEdge 2100 system’s
CD-ROM drive and press the reset button. When the sys-
tem boots, the CD main menu appears.
If the CD does not boot, check the following:
• In the System Setup program, the Onboard SCSI cat-
egory must be set to Scanned and the Boot Sequence
category must be set to A: then C: (see Chapter 4,
“Using the System Setup Program”).
• In the SCSISelect Utility, the Bios Support for Boot-
able CD-ROM category must be set to Enabled (see
Chapter 3, “Installing and Configuring SCSI
Drivers”).
CD Main Menu
The main menu of the CD includes the following catego-
ries, each of which has one or more options. The
subsections that follow describe the options within each
main menu category. The main menu on your CD may
contain additional options.
Choose Language
• Deutsch
• English
• Espanol
• Francais
Configure the System
• Run EISA Configuration Utility
Run System Utilities
• Run System Diagnostics
Use Online Manuals
• Use the System User’s Guide
Create Diskettes
• Create Blank Formatted Diskette
• Create Utility Diskettes
— Create EISA Configuration Utility Diskette
— Create System Utility Diskette
• Create Operating System Support Diskettes
— Create Windows NT Server 3.51 Diskettes
– Create Driver Diskette
— Create Netware 4.x Diskettes
– Create Driver Diskette
– Create Adaptec EZ-SCSI Diskette
— Create Netware 3.12 Diskettes
– Create Driver Diskette
— Create Adaptec EZ-SCSI Diskette


