


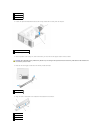

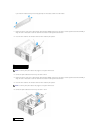

5. Press out the securing clip at each end of the memory module connector.
6. Grasp the module and pull up.
If the module is difficult to remove, gently ease the module back and forth to remove it from the connector.
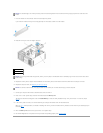
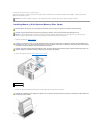
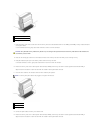
7. Replace the memory fan on the fan support structure.
8. Replace the memory shroud. Tighten the thumbscrews until the memory shroud is well secured and will not shift when the computer is moved.
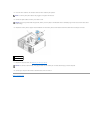
9. Replace the computer cover (see Replacing the Computer Cover).
10. Connect your computer and devices to electrical outlets, and turn them on.
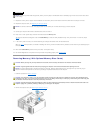
Memory Installation (With Optional Memory Riser Cards)
The four memory riser cards that you received with your computer are connected together in sets of two. Do not attempt to disconnect the memory riser cards
from each other. Each memory riser card is numbered in the upper left hand corner. These numbers indicate which DIMM slot on the system board each riser
card must be inserted into. Only the DIMM_1-4 slots (the slots with the white securing clips) on the system board can be used with the riser cards. The other
slots (DIMM_5-8) must be left vacant.
You must remove the memory riser cards from the computer in order to install memory on them. The memory slots on each riser card are numbered DIMM_1-
DIMM_4. Memory must be installed on these cards in the order that they are numbered; that is, DIMM_1 on riser card 1 must be populated before DIMM_1 is
populated on any other card. DIMM_1 must be populated on each card before DIMM_2 can be populated on riser card 1, and so on. Memory must be installed
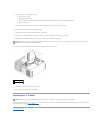
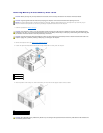
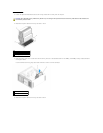
1
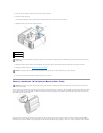
memory shroud
2
thumbscrews (2)
3
memory fan
NOTICE: The memory shroud holds the (optional) memory risers in place; its thumbscrews must be sufficiently tight in order to secure the risers and to
avoid damage.
NOTICE: To connect a network cable, first plug the cable into the network port or device and then plug it into the computer.
NOTICE: The memory shroud holds the (optional) memory risers in place; its thumbscrews must be sufficiently tight in order to secure the riser cards
and to avoid damage.