


If you installed a processor replacement kit from Dell, return the original heat-sink assembly and processor to Dell in the same package in which your
replacement kit was sent.
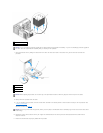
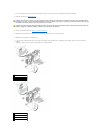
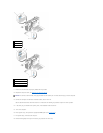
14. Install the heat-sink assembly:
a. Place the heat-sink assembly back onto the heat-sink assembly bracket.
b. Rotate the heat-sink assembly down towards the computer base and tighten the four captive screws.
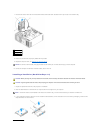
15. Replace the memory shroud and memory fan. Tighten the thumbscrews until the memory shroud is well secured and will not shift when the computer is
moved.
16. Ensure that all connectors are properly cabled and firmly seated.
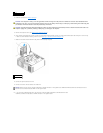
17. Replace the computer cover (see Replacing the Computer Cover).
18. Connect the computer and devices to electrical outlets, and turn them on.
19. Press <F2> to enter system setup and check under Processor Info to verify that the new processor has been installed properly.
Back to Contents Page
NOTICE: If you are not installing a processor upgrade kit from Dell, reuse the original heat-sink assembly when you replace the processor.
NOTICE: Ensure that the heat-sink assembly is correctly seated and secure.
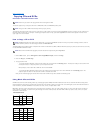
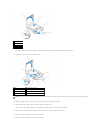
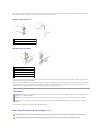
1
heat-sink assembly
2
captive screw housing (4)
NOTICE: The memory shroud holds the (optional) memory risers in place; its thumbscrews must be sufficiently tight in order to secure the risers and to
avoid damage.
NOTICE: To connect a network cable, first plug the cable into the network port or device and then plug it into the computer.