Entering the RAID Configuration Utility
1. Boot the system.
2. Press <Ctrl><C> during POST when prompted.
If you wait too long and the operating system logo appears, continue to wait until the operating system completes bootup. Then restart your system
and try again.
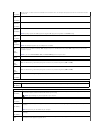
The Configuration Utility menu screen displays.
Navigating Within the Configuration Utility
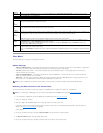
Configuration screens are organized in a hierarchical fashion. Navigational hints are displayed at the bottom of each screen. Online help is also available in this
utility.
RAID Configuration and Management
In order to access any of the integrated RAID (IR) configuration and management screens, select RAID Properties on the Adapter Properties screen. From
here you can create a new RAID volume and view or manage existing RAID volumes.
l If no RAID volumes are currently configured, you are prompted to create a RAID virtual disk (a RAID volume).
l If at least one RAID volume is currently configured, any existing RAID volumes are displayed for management purposes.
Exit Screen
It is important to exit the RAID Configuration Utility properly, because some changes take effect only when you exit. From the Adapter List, press <Esc> to
exit. In addition, a similar exit screen appears when you exit most other screens, and it can be used to save settings.
Performing Configuration Tasks
The two options for creating a new RAID volume are Create IM Volume and Create IS Volume. IM stands for integrated mirroring. IS stands for integrated
striping. Additional information is available on the configuration screen.
Creating a RAID Level 0 Configuration
Follow these steps to create a RAID 0 volume on a SAS 5/iR controller that does not currently have a RAID volume configured.
1. Select a controller from the Adapter List in the Configuration Utility.
2. Select the RAID Properties option.
3. Select Create IS Volume when you are prompted to create either an IS (striped) RAID volume or an IM (mirrored) RAID volume.
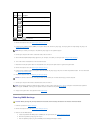
The next screen shows a list of hard drives that can be added to a RAID volume.
4. Move the cursor to the RAID Disk column. To add a hard drive to the RAID volume, change "No" to "Yes" by pressing the <+>, <->, or space bar. As
hard drives are added, the Virtual Disk Size field changes to reflect the new size of the RAID volume.
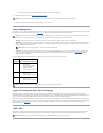
All data will be lost upon creation of the RAID volume. Dell recommends backing up your data before performing these steps.
When creating an IS (striped) RAID volume:
l All drives must be either Dell compliant SAS or SATA hard drives.
l SAS and SATA hard drives cannot be used in the same RAID volume.
NOTE: Dell recommends backing up your data prior to adding or updating configurations.
NOTICE: You will lose any data on your hard drives when you create a RAID configuration using the following procedures. Back up data that you want
to keep before continuing.
NOTE: Your RAID array cannot exceed 2 Terabytes in size. Any space beyond the 2-Terabyte limitation will not be usable.
NOTE: RAID 0 does not provide any data protection in the event of hard drive failure. It is primarily used to increase performance.
NOTE: Once the number of hard drives in a RAID volume (virtual disk) is set, it cannot be changed.


