


11. Remove any components that restrict access to the system board.
12. Disconnect all cables from the system board.
13. Before you remove the existing system board assembly, visually compare the replacement system board to the existing system board to ensure that
you have the correct part.
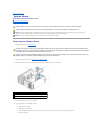
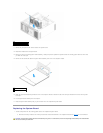
14. Remove the two screws that attach the system board assembly to the rear of the computer chassis.
15. Slide the system board assembly toward the front of the computer chassis to release the tabs on the computer chassis from the slots on the system
board pan.
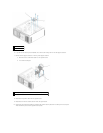
16. Lift the system board assembly from the computer.
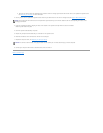
17. Place the system board assembly that you just removed next to the replacement system board.
Replacing the System Board
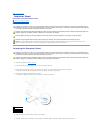
1. Transfer components from the existing system board to the replacement system board:
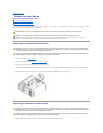
a. Remove the memory modules or the memory module riser cards and install them on the replacement board. See Memory for more information.
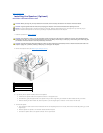
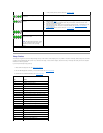
1
screws (2)
2
processor and card fan case
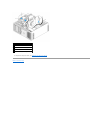
1
system board assembly
2
back of computer
CAUTION: The processor package and heat-sink assembly can get hot. To avoid burns, ensure that the package and assembly have had sufficient
time to cool before you touch them.