Replacing the System Board 307
Replacing the System Board
Removing the System Board: Mini Tower, Desktop, Small Form
Factor, and Ultra Small Form Factor Computers
1
Follow the procedures in "Before You Begin" on page 21.
2
Remove the computer cover.
NOTICE: Before touching anything inside your computer, ground yourself by touching an unpainted metal surface,
such as the metal at the back of the computer. While you work, periodically touch an unpainted metal surface to
dissipate any static electricity that could harm internal components.
3
Remove any components that restrict access to the system board (optical drive[s], floppy drive, hard
drive, I/O panel (as applicable).
4
Remove the processor and heat sink assembly:
• Mini tower: see "Processor" on page 73
•Desktop: see "Processor" on page 149
• Small form factor: see "Processor" on page 213
• Ultra small form factor: see "Processor" on page 261
5
Disconnect all cables from the system board.
6
Remove the screws from the system board.
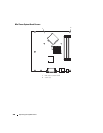
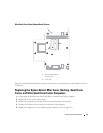
• Mini tower: remove the heat sink bracket and the screws indicated in "Mini Tower System Board
Screws" on page 308
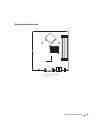
• Desktop: see "Desktop System Board Screws" on page 309
• Small form factor: see "Small Form Factor System Board Screws" on page 310
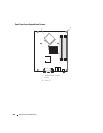
• Ultra small form factor: see "Ultra Small Form Factor System Board Screws" on page 311
7
Slide the system board assembly toward the front of the computer, and then lift the board up and away.


