2640A/2645A NetDAQ
Users Manual
6-18
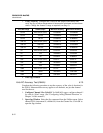
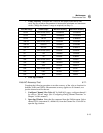
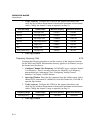
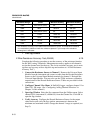
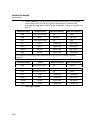
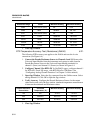
Resistance Range* 5700A Minimum Reading Maximum Reading
300Ω Short Circuit (Zero) 0Ω 10Ω
300Ω 190Ω 189.91Ω 200.09Ω
3 kΩ Short Circuit (Zero) 0Ω 10.5Ω
3 kΩ 1.9 kΩ 1.8991 kΩ 1.9109 kΩ
30 kΩ 19 kΩ 18.989 kΩ 19.021Ω
300 kΩ 190 kΩ 189.75 kΩ 190.26 kΩ
3 MΩ 1.9 MΩ 1.8942 MΩ 1.9058 MΩ
* The resistance accuracy in this table makes allowance for up to 0.1Ω of lead wire resistance.
You must add any additional lead wire resistance present in your setup to the resistance
values given in this table..
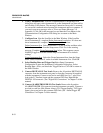
5. Close Spy Window.
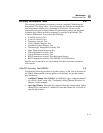
2-Wire Resistance Accuracy Test (2645A) 6-18.
Complete the following procedure to test the accuracy of the resistance function
for the 2645A using 2 terminals. Measurement accuracy applies to all channels,
not just the channel used for the test. (The 4-wire resistance accuracy test is more
rigorous and you may wish to skip this step and continue to “4-Wire Resistance
Accuracy Test.”)
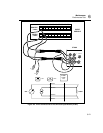
1. Connect the Resistance Source to Channel 1 Remove the Universal Input
Module from the instrument and connect a cable from the Decade Resistance
Source to the Universal Input Module terminals for channel 1. Reinstall the
Universal Input Module. You may also use the 5700A resistance calibration
output instead of the Decade Resistance Source. Tables are provided for both
connections.
2. Configure Channel 1 for Ohms In NetDAQ Logger, configure channel 1 for
Ohms-2W, 30k range. (See “Configuring Analog Channel Functions" in
Chapter 3 of this manual.)
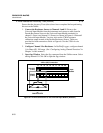
3. Open Spy Window Select the Spy command from the Utilities menu. Select
channel 0101 (instrument 01, channel 01) from the Channel list. Click OK to
open the Spy window.
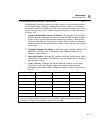
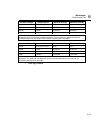
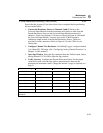
4. Verify Accuracy Configure the Decade Resistance Source for the output
values below and verify the Spy window measurement is between the
minimum and maximum values. Change the channel 1 range as required (see
Step 2).


