Preparing for Operation
Instrument Preparation
2
2-7
DC Power 2-7.
The instrument operates from any dc voltage between 9 and 16 volts. Power
consumption is a nominal 6 watts. To connect the ALARM/TRIGGER I/O
connector to the rear panel, complete the following procedure:
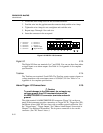
1. Remove the ALARM/TRIGGER I/O connector from the packing material or
instrument rear panel.
2. Loosen the wire clamp screw for the associated terminal.
3. Feed the wire into the gap between the connector body and the wire clamp.
4. Tighten the wire clamp; do not overtighten and crush the wire.
5. Repeat steps 2 through 4 for each wire.
6. Insert the connector in the rear panel.
Grounding and Common Mode Voltage 2-8.
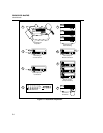
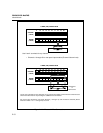
Connect the instrument chassis to a good earth ground (Figure 2-2) to prevent a
common mode voltage from gradually raising the chassis to a high potential. For
example, if you measure the voltage across a resistor in a 50V dc circuit, the
instrument reads the resistor voltage and ignores the 50V dc common mode
voltage. Since the impedance between the channel’s inputs and chassis ground is
not infinite, a common mode voltage gradually leaks to the chassis ground. A
good earth ground prevents the chassis from rising to the common-mode voltage
(50V dc in this case).
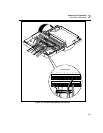
Universal Input Module Connections 2-9.
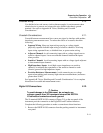
Connections to the Universal Input Module (Figure 2-3) use the H (high) and L
(low) pairs of terminals for each of the 20 analog input channels. Complete the
following procedure to make connections.
PWarning
To avoid electric shock, remove all inputs from live
voltages before opening this module. Input wiring may be
connected to live voltages.
1. Remove the module from the rear panel by pressing the release tab on the
bottom of the module and pulling the module free of the connector.
2. Loosen the two large screws on top and open the module.
3. Connect the wires to H (high/positive) and L (low/negative) for each channel.
4. Thread these wires through the strain-relief pins and out the back of the
module.


