


Installing Hardware 51
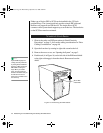
5. Open the subchassis (see “Opening the Subchassis and Electronics
Bay” on page 5) to gain access to the back of the 5.25-inch drive bay.
6. Remove the drive from its protective wrapper, and place it on an
antistatic surface.
7. Set any jumpers or switches on the drive according to the drive
manufacturer’s instructions.
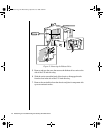
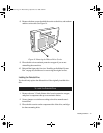
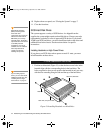
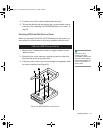
8. Using two screws of the appropriate size and length (not supplied),
attach each plastic slide rail (see Figure 17) with its metal grounding
plate to the drive.
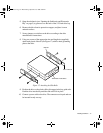
Figure 17: Attaching the Slide Rails
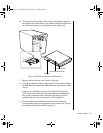
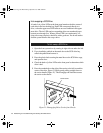
9. Position the drive so the plastic slide rails engage in the bay guide rails.
Push the drive into the bay until the slide rails lock in place.
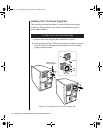
10. Connect a power cable to the drive. The connectors are keyed and can
be inserted in only one way.
Slide rail
Tab on slide rail
Removable media device
3424.boo Page 51 Wednesday, September 2, 1998 9:23 AM