


Trakker Antares 243X Hand-Held Terminal User’s Manual
nugget
39
1-26
Drive C is a 2MB flash drive. You can use up to 750K of this flash drive to store up to
128 files on drive C. Applications must be stored on drive C. You use standard ANSI C
library interface definitions to access the information on this drive.
Drive D or font set is 2MB drive of flash memory that you can configure as drive D.
Use this flash drive to store large lookup tables and data files. You can store up to 128
files. You can also order the flash memory to come pre-loaded with a double-byte font
set. To configure this flash memory, see “Flash Memory Configuration” in Chapter 6 of
the 2400 Family system manual.
Drive E is a configurable RAM drive (up to 256K). The contents of this drive are
erased when you boot or reset the terminal. You can store up to 128 files on drive E, and
you can access these files using standard ANSI C functions. By default, the RAM drive
is not configured and the memory is available for programmable (Malloc) memory
allocations. To configure the RAM drive, see “RAM Drive Size” in Chapter 6 of the
2400 Family system manual.
Drive G (optional) is an optional 2MB or 4MB extended storage drive that is only
available on the 2430. Use this drive to store large lookup tables and data files. You can
store up to 128 files on drive G, and you can access these files using standard ANSI C
functions.
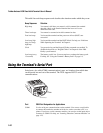
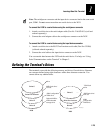
Malloc/free memory On the terminals, applications are customer defined. You have
512K total RAM that you can use for the application execution space. You can also
configure this RAM to be the RAM drive (up to 256K). The remaining RAM is the
Malloc/free memory pool.
Application
execution space
+RAM drive
(drive E)
+ Malloc/free
memory pool
= 512K RAM
Using the Terminal for the First Time
Before you can use the 243X for the first time, you must perform certain steps, such as
setting the time and date. You can find this information throughout this user’s manual.
However, if you want to start using the terminal immediately, see the Trakker Antares
243X Hand-Held Terminal Quick Start Guide (Part No. 071792).
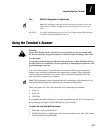
To use the 243X for the first time
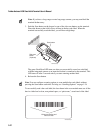
1. Unpack the terminal and documentation.
2. Charge and install the battery pack (sold separately). For more information about
batteries, see “Using the Terminal’s Battery Pack” on page 1-8.
3. Press to turn on the terminal. For more information about the keypad, see
“Using the Keypad” on page 1-11.
4. (Optional) Set the time and date. For help using the TRAKKER Antares 2400 Menu
System, see “Configuring the Terminal With the Menu System” in Chapter 2.