


Disabling the USB device driver interface
If you want to prevent any application that is running on the server from requesting
the Remote Supervisor Adapter II to perform tasks, you must disable the USB
device driver interface. To disable the USB device driver interface, complete the
following steps.
1. Log in to the Remote Supervisor Adapter II on which you want to disable the
USB device driver interface. For more information, see Chapter 2, “Opening and
using the Web interface,” on page 5.
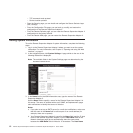
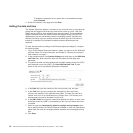
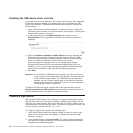
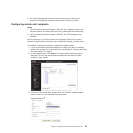
2. In the navigation pane, click System Settings and scroll down to the
Miscellaneous area. A page similar to the one in the following illustration is
displayed.
3. Select the Disallow commands on USB interface check box to disable the
USB device driver interface. Selecting this option does not affect the USB
remote control functions (for example, keyboard, mouse, and mass storage).
When you disable the USB device driver interface, the in-band
system-management applications such as the management processor
command-line interface (MPCLI) and Advanced Settings Utility (ASU) are
disabled. If you try to use system-management applications while the device
driver interface is disabled, there might be unwanted consequences.
4. Click Save.
Important:
If you disable the USB device driver interface, you cannot perform an
in-band update of the Remote Supervisor Adapter II firmware using the
Linux or Windows flash utilities. If the USB device driver interface is
disabled, use the Firmware Update option on the Remote Supervisor
Adapter II Web interface to update the firmware. For more information,
see “Updating firmware” on page 88.
To enable the USB device driver interface after it has been disabled, clear the
Disallow commands on USB interface check box and then restart the server so
that the USB device driver is loaded and initialized correctly.
Creating a login profile
Use the Login Profiles table to view, configure, or change individual login profiles.
Use the links in the Login ID column to configure individual login profiles. You can
define up to 12 unique profiles. Each link in the Login ID column is labeled with the
configured login ID for that particular profile. If you have not configured a profile, the
name of the link, by default, will be ~ not used ~.
To configure a login profile, complete the following steps:
1. Log in to the Remote Supervisor Adapter II where you want to create a login
profile. For more information, see Chapter 2, “Opening and using the Web
interface,” on page 5.
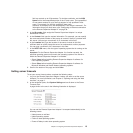
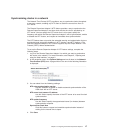
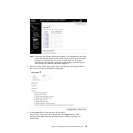
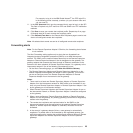
2. In the navigation pane, click Login Profiles. The Login Profiles page displays
each login ID, the login access level, and the password expiration information,
as shown in the following illustration.
18 Remote Supervisor Adapter II SlimLine and Remote Supervisor Adapter II: User’s Guide