


Intel® NetStructure™ ZT 8101 10/100 Ethernet Switch User’s Manual 15
Installation and Initial Setup 2
This chapter provides installation and initial setup information for the switch.
Installing the Board
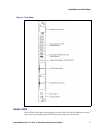
These instructions explain the mechanical aspects of installing a ZT 8101 board. The board should
be installed in a PICMG* 2.16-compliant fabric slot.
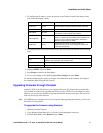
1. System power does not need to be off to insert a ZT 8101 board.
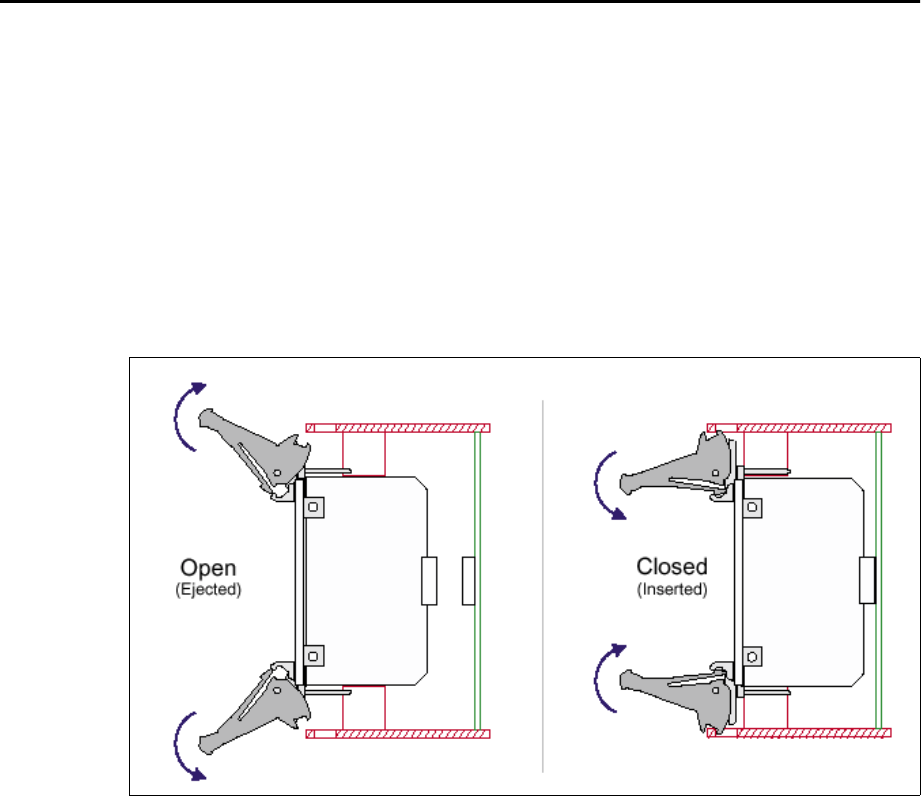
2. Prepare the board by opening the injector/ejector mechanisms.
3. Carefully align the edges of the board with the left and right card guides in the appropriate slot.
It may be helpful to look into the enclosure to verify correct alignment of the rails in the
guides.
4. Taking care to keep the board aligned in the guides, slide the board in until the injector/ejector
mechanisms engage the retention bars.
5. Simultaneously push in the board and rotate the injector/ejector mechanisms to their closed
positions (rotate inward) to seat the backplane connectors. When the board is in place, it will
boot if the system power is on.
6. Make the desired connections at the faceplate and configure the board.
Power on
After the power switch is turned on, the LED indicators should respond as follows:
Figure 1. Injector/Ejector Operations