Installing Software When a Firewall Does Not Exist
E-Series Routers
B-13
Installing Software in Boot Mode
To install the E-series software in Boot mode, you must access the CLI via
the local console.
To install the software:
1 Obtain the required information for the installation.
2 Divert network traffic to another router.
3 Access the Boot mode.
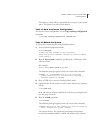
4 Assign an IP address to the E-series router.
5 Configure access to the network host.
6 Mount the CD on the network host.
7 Copy the software release file to the E-series router.
8 Reboot the system.
Task 1: Obtain the Required Information
Before you install the software, obtain the following information:
• The IP address of the network host
• The IP address of the E-series router
• The IP address of the next hop to reach the destination network (for
example, a gateway)
• The login name and password for the FTP server
• The procedure for mounting a CD on the network host
Task 2: Divert Network Traffic to Another System
The system will be unavailable during the installation process.
Task 3: Access the Boot Mode
To access Boot mode from the local console:
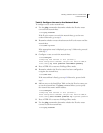
1 At the Privileged Exec prompt, type the reload command.
Information on the reloading process appears.
2 When the countdown begins, press the key sequence <mb>.
This action puts the CLI in Boot mode and the :boot## prompt
appears.


