Chapter 5---Electronics
5-48 Model 250 Service Manual
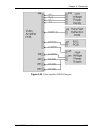
The Video Amplifier PCB detects all the necessary supply voltages (+80 V, +15
V, and the +6.2 V) for the CRT and includes that as part of the /VA_OK signal. If
any of the supply voltages is not present, /VA_OK goes high, again shutting down
the G1 and G2 regulators. The /VA_OK goes out to the High Voltage Power
Supply as the /HV_ENA. If the /VA_OK goes high, the /HV_ENA goes high and
shuts down the high voltage amplifier section of the High Voltage Power Supply
(see CRT Protection section of the Ch 7-- Troubleshooting).
The CRT Protection circuit on the Video Amplifier PCB also has a beam current
sense line for each CRT that comes from the output of the image amplifier circuit.
It samples each CRT beam current and sends that back to the Video Processor
PCB. The Video Processor PCB compares the beam current to a reference value
(250 µA). If the beam current of any CRT meets or exceeds that reference value,
the Video Amplifier PCB reduces the Contrast of the CRTs (a global adjustment)
until the beam current is below the reference.
The CRT Protection circuit also provides isolation of the anode voltage return
through the Arc Ground circuit. Occasionally, particles flake off metal
components inside CRTs that cause shorting inside the CRT. On these occasions,
the Arc Ground circuit is an isolated ground path back to the High Voltage Power
Supply. This isolation protects the other supply voltage returns.
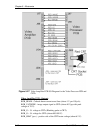
The Video Amplifier PCB has three CRT Socket PCBs that are attached to the
back of each CRT. These PCBs provide an interface between the Video Amplifier
PCB and the CRT for the image signal, G
1
, G
2
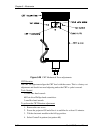
, and filament voltages (see Figure
5-28). The Arc Ground cable is also routed through the CRT Socket PCB. The
Anode cables are routed directly from the High Voltage Power Supply to each
CRT. The red Focus Voltage cables are routed directly to each CRT Socket PCB.
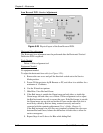
Video Amplifier PCB - Remove and Replace
The Video Amplifier PCB is located under the CRT assemblies at the rear of the
projector.
Tools Needed
#1 Pozi-drive Phillips-head screwdriver
2.5-mm Hex wrench
Parts Needed
Video Amplifier PCB p/n 105232
To remove a Video Amplifier PCB:
1. Power off the projector by IR Remote or PC, and allow the cooling fans to
run until they shut off automatically.
2. Turn the AC Circuit Breaker to the OFF position and unplug the AC
Power Cord.
3. Remove the rear cover.
4. Tilt the Electronic Module up.


