Chapter 8---Software and Protocol
Model 250 Service Manual 8-1
8.0 Software and Protocol
Contents
8.1 Software Updating........................................................................................ 8-1
8.2 Importing/Exporting..................................................................................... 8-5
Configuration ............................................................................................. 8-5
Exporting.................................................................................................... 8-6
Importing.................................................................................................... 8-7
Null Modem Adapter .................................................................................8-9
8.3 Terminals and Communication Protocol...................................................... 8-10
Terminals.................................................................................................... 8-10
Terminal Preferences.................................................................................. 8-10
Communications Protocol.......................................................................... 8-11
8.1 Software Updating
The Model 250 software resides in Flash Memory and is updated via the
projector's serial Port A. To perform an update, a disk containing the updated
Boot Software (boot.hex) and/or System Software (zsys.hex) and a PC with
Windows 3.1 (Windows 95/98 with Procomm Plus fax/modem software) is
required to perform update.
Boot Manager Software and System Software are separate products. Each may be
updated independently. The System Software will depend on a specific version of
the Boot Manager. Refer to the System Software release bulletin for Boot
Manager version dependencies.
To perform software upgrade:
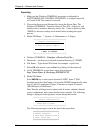
1. Verify that the projector circuit breaker is off. Use a Null Modem cable to
connect a PC to the projector’s Serial Port A (Terminal-In).
2. Start Windows 3.1.
3. Click on the terminal icon from the Accessories Directory.
4. From the Terminal menu, select Settings-Terminal Emulation and click on
DEC-VT-100 (ANSI).
Select OK.
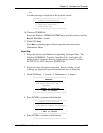
5. Under Settings, choose Terminal Preferences.
!
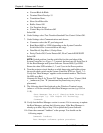
Under Terminal Preferences the following selections are appropriate;
Terminal Modes=Sound
!
CR->CR/LF=Both off
!
Columns=80


