


20 - ENGLISH
Chapter 1 Preparation — About your projector
About your projector
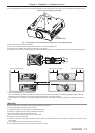
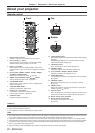
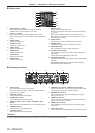
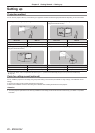
Remote control
1
2
3
4
5
6
7
8
9
10
11
12
13
14
15
16
17
18
19
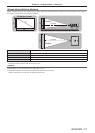
Front Top
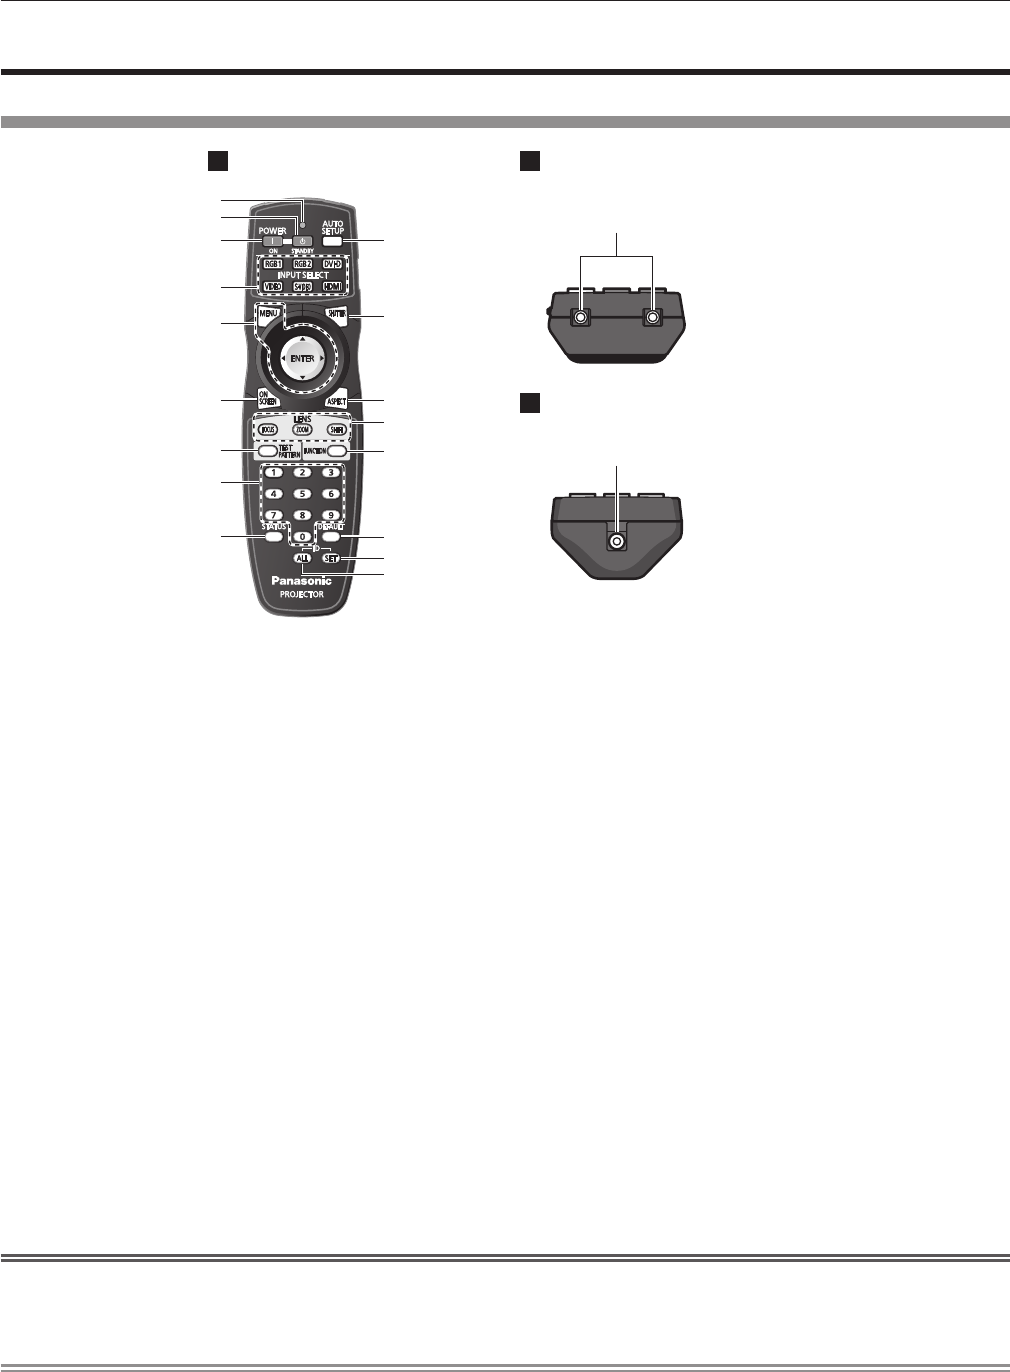
Bottom
1 Remote control indicator
Flashes if any button in the remote control is pressed.
2 Power standby <
v
> button
Sets the projector to the standby mode when the <MAIN
POWER> switch on the projector is set to <ON>.
3 Power on <
b
> button
Starts projection when the <MAIN POWER> switch on the
projector is set to <ON> and the power is switched off (standby
mode).
4 Input selection (<RGB1>, <RGB2>, <DVI-D>, <VIDEO>,
<S-VIDEO>, <HDMI>) buttons
Switches the input signal to project. (
x
page 48)
5 <MENU> button/<ENTER> button/
asqw
buttons
Used to operate the menu screen. (
x
page 51)
6 <ON SCREEN> button
Switches the on-screen display function on (displayed)/off
(hidden). (
x
page 47)
7 <TEST PATTERN> button
Displays the test pattern. (
x
page 49)
8 Number (<0> - <9>) buttons
Used when the system uses multiple projectors.
Used to input ID numbers or passwords.
9 <STATUS> button
Displays the projector information.
10 <AUTO SETUP> button
Automatically adjusts the image display position while projecting
the image.
[PROGRESS] is displayed on the screen while the image is
adjusted automatically. (
x
page 48)
11 <SHUTTER> button
Use to temporarily turn off the image. (
x
page 47)
12 <ASPECT> button
Switches the aspect ratio of the image. (
x
page 49)
13 Lens (<FOCUS>, <ZOOM>, <SHIFT>) buttons
Adjusts the projection lens. (
x
pages 43, 45)
14 <FUNCTION> button
You can assign a frequently used operation as a shortcut button.
(
x
page 49)
15 <DEFAULT> button
Resets the content of the sub-menu to the factory default.
(
x
page 51)
16 <ID SET> button
Sets the ID number of the remote control when a system uses
multiple projectors. (
x
page 23)
17 <ID ALL> button
Use to simultaneously control all the projectors with one remote
control when a system uses multiple projectors. (
x
page 23)
18 Remote control signal transmitter
19 Remote control wired terminal
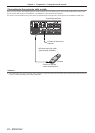
Connecting to the projector with a cable
(
x
page 24)
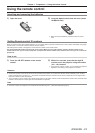
Attention
rf
Do not drop the remote control.
rf
Avoid contact with liquids or moisture.
rf
Do not attempt to modify or disassemble the remote control.
Note
rf
The remote control can be used within a distance of about 30 m (98'5") if pointed directly at the remote control receiver. The remote control
can control at angles of up to ±15° vertically and ±30° horizontally, but the effective control range may be reduced.
rf
If there are any obstacles between the remote control and the remote control signal receiver, the remote control may not operate properly.
rf
The signal will be reected off the screen. However, the operating range may be limited from light reection loss due to the screen material.
rf
If the remote control signal receiver directly receives strong light, such as uorescent light, the remote control may not operate properly.
Use it in a place distant from the light source.
rf
The power indicator <ON (G)/STANDBY (R)> will ash if the projector receives a remote control signal.