


ENGLISH - 83
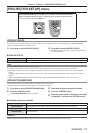
Chapter 4 Settings — [PROJECTOR SETUP] menu
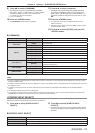
[SYSTEM DAYLIGHT VIEW] Switches the [SYSTEM DAYLIGHT VIEW] setting. (
x
page 57)
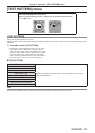
[FREEZE] Temporarily freezes video to be a still image. (
x
page 73)
[SIDE BY SIDE]
*
Switches to the two window display. (
x
page 73)
* Only for PT-DW740U
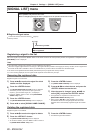
[DATE AND TIME]
Set the time zone, date, and time of the built-in clock of the projector.
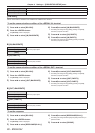
To set time zone
1)
Press as to select [DATE AND TIME].
2)
Press the <ENTER> button.
rf
The [DATE AND TIME] screen is displayed.
3)
Press as to select [TIME ZONE].
4)
Press qw to switch [TIME ZONE].
To set the date and time manually
1)
Press as to select [DATE AND TIME].
2)
Press the <ENTER> button.
rf
The [DATE AND TIME] screen is displayed.
3)
Press as to select [ADJUST CLOCK].
4)
Press the <ENTER> button.
rf
The [ADJUST CLOCK] screen is displayed.
5)
Press as to select an item, and press qw to
set the local date and time.
6)
Press as to select [APPLY], and press the
<ENTER> button.
rf
The setting of the time will be completed.
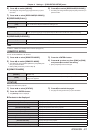
To set the date and time automatically
1)
Press as to select [DATE AND TIME].
2)
Press the <ENTER> button.
rf
The [DATE AND TIME] screen is displayed.
3)
Press as to select [ADJUST CLOCK].
4)
Press the <ENTER> button.
rf
The [ADJUST CLOCK] screen is displayed.
5)
Press as to select [NTP SYNCHRONIZATION],
and press qw to change the setting to [ON].
rf
The setting will change between [ON] and [OFF] each time you
press the button.
6)
Press as to select [APPLY], and press the
<ENTER> button.
rf
The setting of the time will be completed.
rr
[NTP SYNCHRONIZATION]
[ON] Enables [NTP SYNCHRONIZATION].
[OFF] Disables [NTP SYNCHRONIZATION].
Note
rf
To set the date and time automatically, the projector must be connected to the network.
rf
If synchronization with the NTP server fails just after [NTP SYNCHRONIZATION] is turned [ON], or if [NTP SYNCHRONIZATION] is turned
[ON] while the NTP server is not set, [NTP SYNCHRONIZATION] will return to [OFF].
rf
Access the projector via a web browser to set the NTP server. Refer to “[Adjust clock] page” (
x
page 99) for details.
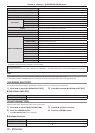
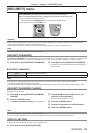
[SAVE ALL USER DATA]
Save the various setting values as a backup in the built-in memory of the projector.
1)
Press as to select [SAVE ALL USER DATA].
2)
Press the <ENTER> button.
rf
The [SECURITY PASSWORD] screen is displayed.
3)
Enter a security password and press the
<ENTER> button.
4)
When the confirmation is displayed, select [OK]
or [CANCEL], and press the <ENTER> button.
rf
[PROGRESS] is displayed while saving data.
Note
rf
The image setting registered in [USER LOGO] is not saved.