


58 - ENGLISH
Chapter 4 Settings — [PICTURE] menu
2)
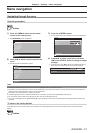
Press qw or the <ENTER> button.
rf
The [SYSTEM DAYLIGHT VIEW] individual adjustment screen
is displayed.
3)
Press qw to switch [SYSTEM DAYLIGHT
VIEW].
rf
The setting will change among [OFF], [1], [2] and [3] each time
you press the button.
rr
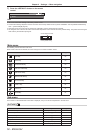
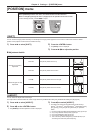
[SYSTEM DAYLIGHT VIEW]
[OFF] No correction.
[1] Corrects the image to weaken vividness.
[2] Corrects the image to medium vividness.
[3] Corrects the image to high vividness.
[SHARPNESS]
You can adjust the sharpness of the projected image.
1)
Press as to select [SHARPNESS].
2)
Press qw or the <ENTER> button.
rf
The [SHARPNESS] individual adjustment screen is displayed.
3)
Press qw to adjust the level.
rr
Operations and adjustment range
Operation Adjustment Range
Press
w
. Contours become sharper.
0 - +15
Press
q
. Contours become softer.
Note
rf
If you press
w
while the adjustment value is [+15], the value will become [0]. If you press
q
while the adjustment value is [0], the value will
become [+15].
[NOISE REDUCTION]
You can reduce noises when the input image is degraded and noise is occurring in the image signal.
1)
Press as to select [NOISE REDUCTION].
2)
Press qw or the <ENTER> button.
rf
The [NOISE REDUCTION] individual adjustment screen is
displayed.
3)
Press qw to switch [NOISE REDUCTION].
rf
The setting will change among [1], [2], [3] and [OFF] each time
you press the button.
rr
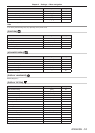
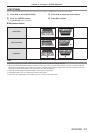
[NOISE REDUCTION]
[1] Corrects the noise to low level.
[2] Corrects the noise to medium level.
[3] Corrects the noise to high level.
[OFF] No correction.
Attention
rf
When this is set for an input signal with less noise, the image may look different from what it originally was. In such case, set it to [OFF].
[AI]
You can perform gradation control appropriate for an image to project it with optimal contrast.
1)
Press as to select [AI].
2)
Press qw or the <ENTER> button.
rf
The [AI] individual adjustment screen is displayed.
3)
Press qw to switch [AI].
rf
The setting will change between [ON] and [OFF] each time you
press the button.
rr
[AI]
[ON] Enables AI correction.
[OFF] Disables AI correction.