


72 - ENGLISH
Chapter 4 Settings — [DISPLAY OPTION] menu
rr
[ON-SCREEN DISPLAY]
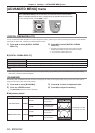
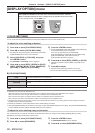
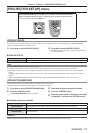
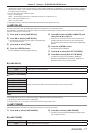
[OSD POSITION]
[2] Set the position of the menu screen (OSD) to the center left of the screen.
[3] Set the position of the menu screen (OSD) to the bottom left of the screen.
[4] Set the position of the menu screen (OSD) to the top center of the screen.
[5] Set the position of the menu screen (OSD) to the center of the screen.
[6] Set the position of the menu screen (OSD) to the bottom center of the screen.
[7] Set the position of the menu screen (OSD) to the top right of the screen.
[8] Set the position of the menu screen (OSD) to the center right of the screen.
[9] Set the position of the menu screen (OSD) to the bottom right of the screen.
[1] Set the position of the menu screen (OSD) to the top left of the screen.
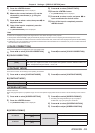
[OSD DESIGN]
[1] Set the color of the menu screen (OSD) to yellow.
[2] Set the color of the menu screen (OSD) to blue.
[3] Set the color of the menu screen (OSD) to white.
[4] Set the color of the menu screen (OSD) to green.
[5] Set the color of the menu screen (OSD) to pink.
[6] Set the color of the menu screen (OSD) to brown.
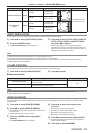
[OSD MEMORY]
[ON]
Set hold for the position of the menu screen (OSD) cursor.
[OFF]
[INPUT GUIDE]
[ON]
Set display of the input terminal name currently selected in the position set by the
[OSD POSITION].
[OFF]
[WARNING MESSAGE]
[ON]
You can set the display/hide of the warning message.
[OFF]
Note
rf
Even if [OSD MEMORY] is set to [ON], the cursor position will not be held when the <MAIN POWER> switch of the projector body is turned
<OFF>.
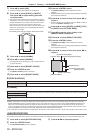
[BACK COLOR]
Set the color of the projected image when there is no signal input.
1)
Press as to select [BACK COLOR].
2)
Press qw to switch [BACK COLOR].
rf
The setting will change among [BLUE], [BLACK], [DEFAULT
LOGO] and [USER LOGO] each time you press the button.
rr
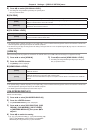
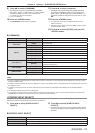
[BACK COLOR]
[BLUE] The entire projection area appears blue.
[BLACK] The entire projection area appears black.
[DEFAULT LOGO] The Panasonic logo is projected.
[USER LOGO] The picture registered by the user is projected.
Note
rf
To create the image for [USER LOGO], “Logo Transfer Software” included in the supplied CD-ROM is required.
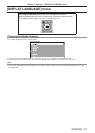
[STARTUP LOGO]
Set the logo display when the power is turned on.
1)
Press as to select [STARTUP LOGO].
2)
Press qw to switch [STARTUP LOGO].
rf
The setting will change among [DEFAULT LOGO], [USER
LOGO], and[NONE] each time you press the button.
rr
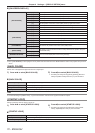
[STARTUP LOGO]
[DEFAULT LOGO] The Panasonic logo is projected.
[USER LOGO] The picture registered by the user is projected.
[NONE] No startup logo is projected.