


Part No. 99-00984-20 REV A0
39 | CHAPTER 5 – MAINTAINING AND TROUBLESHOOTING YOUR SMART BOARD
685ix INTERACTIVE WHITEBOARD SYSTEM
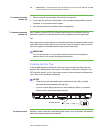
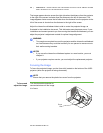
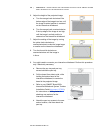
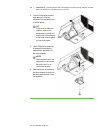
6. Adjust the height of the projected image.
a. Turn the orange knob clockwise if the
bottom edge of the image is too low, until
the image’s vertical position is centered
on the interactive whiteboard.
b. Turn the orange knob counterclockwise
if the top edge of the image is too high,
until the image’s vertical position is
centered on the interactive whiteboard.
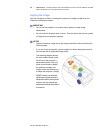
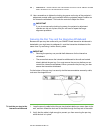
7. Adjust the scaling of the image by turning
the yellow knob clockwise or
counterclockwise to make the image larger
or smaller on the interactive whiteboard.
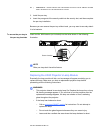
8. Turn the focus dial clockwise or
counterclockwise until the image is
in focus.
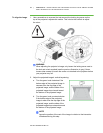
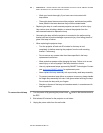
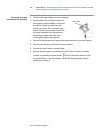
9. You might need to re-center your interactive whiteboard. Perform this procedure
only if absolutely necessary.
a. Remove the pen tray and pen tray
screws behind the pen tray.
b. Pull the board from side to side, while
holding the bottom bezel of the
interactive whiteboard, to center the
board to the projected image.
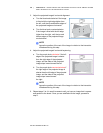
c. Refer to your SMART Board 685ix
Interactive Whiteboard System Textless
Installation Guide
(document 137394),
for instructions on drilling holes for
attaching new anchors for the
interactive whiteboard.
d. Attach the pen tray screws to the new
anchor location, and then attach the
pen tray.