


40 | CHAPTER 5 – MAINTAINING AND TROUBLESHOOTING YOUR SMART BOARD
685ix INTERACTIVE WHITEBOARD SYSTEM
Part No. 99-00984-20 REV A0
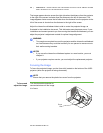
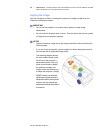
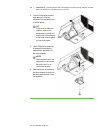
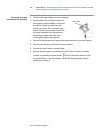
10. Use a screwdriver to tighten the locking ring screw on the top of the projector’s
adjustment module when you’re satisfied with the projected image’s location on
the interactive whiteboard. This locks the controls to adjust the mirror.
IMPORTANT
If you do not secure the locking ring screw, the projector’s adjustment
controls can slip out of place, and you will have to repeat the image
alignment procedure.
Securing the Pen Tray and the Interactive Whiteboard
Because the pen tray that comes with your SMART Board interactive whiteboard is
detachable, you might want to safeguard it—and the interactive whiteboard at the
same time—by anchoring it with a security cable.
IMPORTANT
• Securing the pen tray can provide theft deterrence for the interactive
whiteboard.
• The screws that secure the interactive whiteboard to the wall are located
directly behind the pen tray. You must remove the pen tray before you can
remove the interactive whiteboard. When you secure the pen tray, you also
secure the interactive whiteboard.
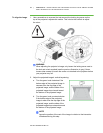
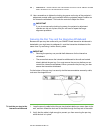
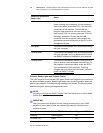
On the bottom of the pen tray is a security slot that accommodates a security cable,
such as a Kensington® lock.
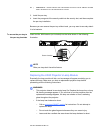
To lock the pen tray to the
interactive whiteboard
1. Loop the security cable behind the pen tray brackets before you screw them to the
wall, and then thread the lock end of the cable through the loop end of the cable.
2. Verify that the cable is tight enough to prevent you from removing the pen tray
while the lock is in place.
Security Slot