Operation
Making Full-Size Image Printouts
19
– Proceed as described in “Error/Warning Messages”
on page 61.
• When an image has not been stored in memory.
– Image data stored in memory is lost if you turn off
the power. Capture the image into memory again,
then press the PRINT button. If no image is stored
in memory, the printer will not print even if you
press the PRINT button.
To make a printout at high speed
You can select the speed using the PRN SPEED item on
the PRINTER SETUP menu.
For detailed information on how to operate the menu,
see “Basic Menu Operations” on page 40.
When you want to see an image that is hidden
below a screen message
You can erase screen messages (such as Q1, A and so
on) from the video monitor screen by pressing the
DISPLAY button. The screen message disappears. To
display a screen message, press the DISPLAY button
again. (See “Erasing the Screen Display on the Video
Monitor” on page 36.) You can also erase the
information about ink ribbon and paper. (See
“Displaying the Type and Remaining Amount of the Ink
Ribbon” on page 54.)
If a black line appears on the printout
Sometimes, a black line appears on the printout,
although it does not appear on the video monitor. This
black line can be eliminated from the printout. (See
“When a Black Frame or Lines Show up on the
Printouts” on page 47.)
If the color quality of the printouts is not
satisfactory
You can obtain satisfactory color quality of the printouts
by compensating for the input signal and/or adjusting
the color quality of the printouts. (See “Compensating
for the Input Signals” on page 43 and “Adjusting the
Printout Color” on page 45.)
When you load a new ink ribbon and paper, the color
balance may change due to differences caused by the
new pair of ink ribbon and paper in the new printing
pack. It is recommended that you adjust the color
balance each time you load a new ink ribbon and paper.
(“Adjusting the Color Balance” on page 48.)
When storing your printouts:
• Avoid storing the printout in a location subject to high
temperatures, high humidity, excessive dust or direct
sunlight.
• Do not stick tape on a printout. Also, avoid leaving a
plastic eraser on a printout or placing a printout in
contact with materials which contain plasticizer
(under a desk mat, for example).
• Do not allow alcohol or other volatile organic solvents
to come into contact with the printouts.
Making Printouts with the Desired
User Set Number
You can register all the printer settings as a user settings.
The printer allows you to register three sets of settings as
User Set 1, 2 and 3. (See “Registering a User Set” on
page 54.) By selecting a desired user set number, the
printer functions according to the corresponding
settings. You can change a part of the selected user
settings and make printouts.
Note
If you change the currently selected user set to another
one, the image stored in memory pages will be cleared.
Be sure to change the LOAD USER number before
capturing the image.
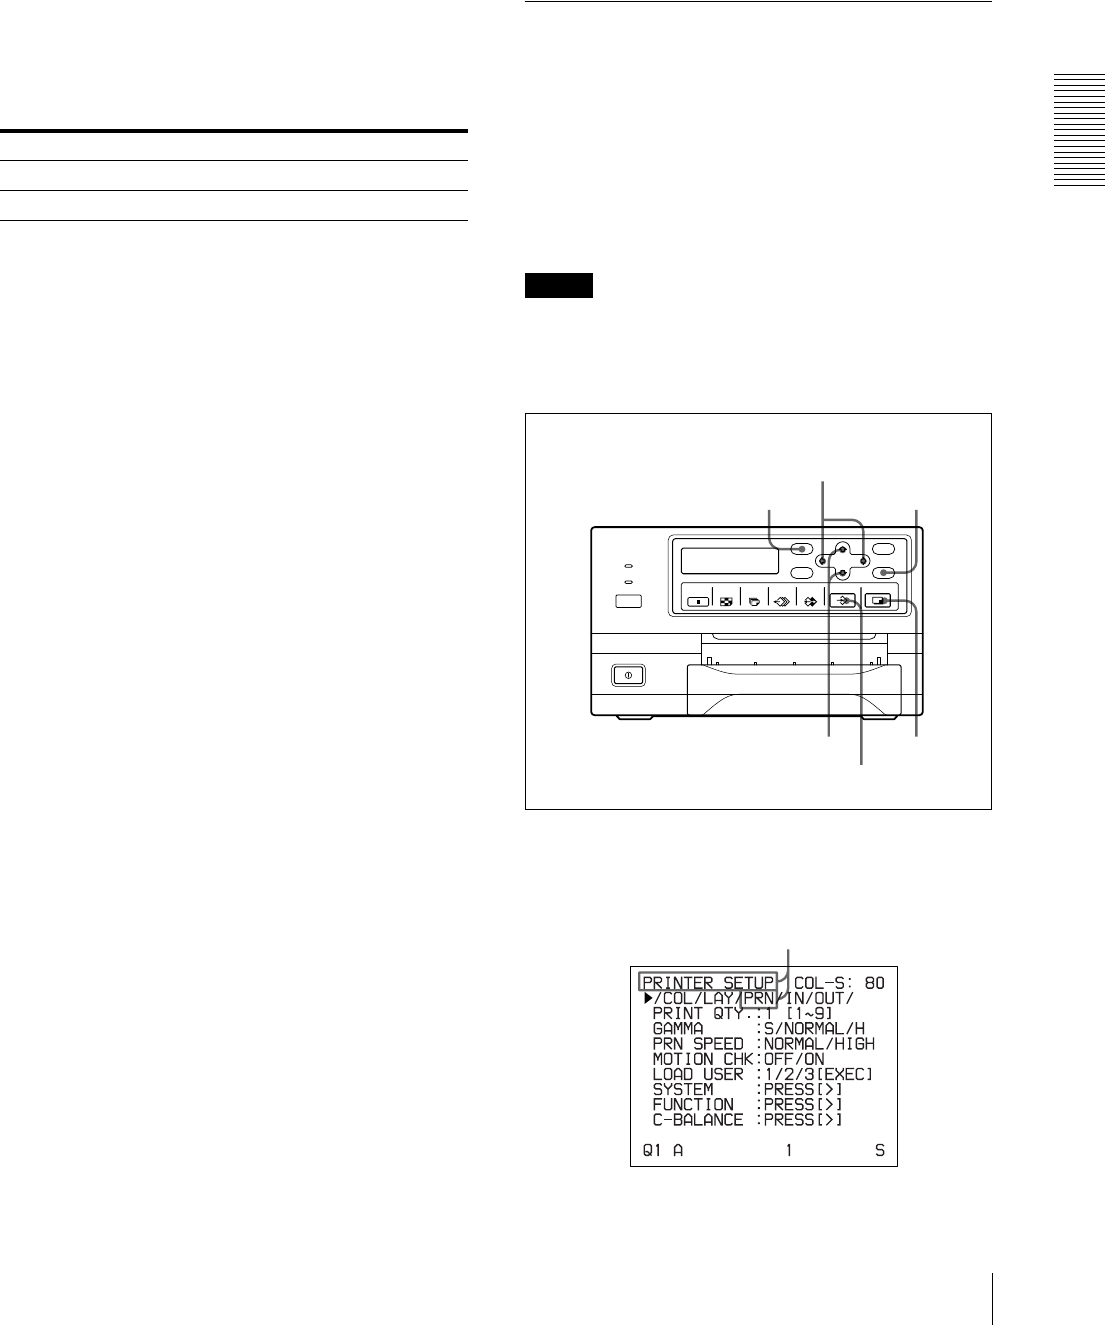
1
Press the MENU button, and display the PRINTER
SETUP menu by pressing the F, f, G or g button.
When you want to PRN SPEED
Make a printout at normal speed. NORMAL
Make a printout at high speed. HIGH
1
1, 2
5
1, 3
4
6
Switch PRN to green by pressing the F, f, G or g
button, then the PRINTER SETUP menu appears.
