


Chapter 9 VLAN
XGS-4526/4528F/4728F User’s Guide
125
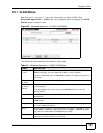
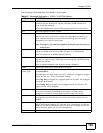
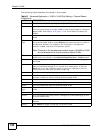
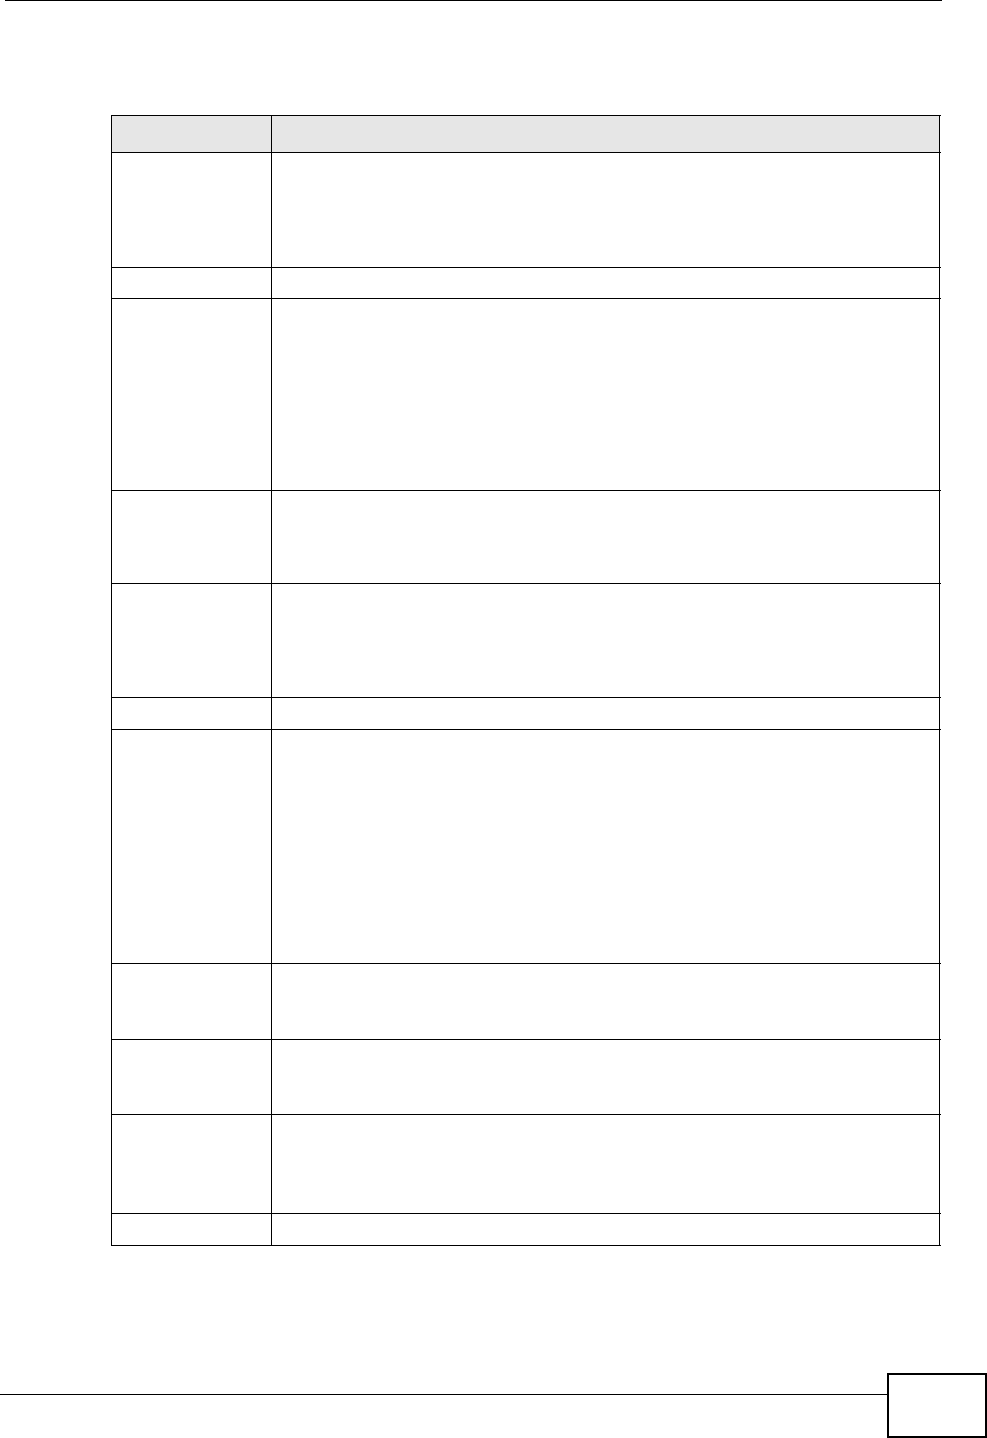
The following table describes the labels in this screen.
Table 19 Advanced Application > VLAN > VLAN Port Setting
LABEL DESCRIPTION
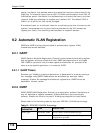
GVRP GVRP (GARP VLAN Registration Protocol) is a registration protocol that
defines a way for switches to register necessary VLAN members on
ports across the network.
Select this check box to permit VLAN groups beyond the local Switch.
Port This field displays the port number.
* Settings in this row apply to all ports.
Use this row only if you want to make some settings the same for all
ports. Use this row first to set the common settings and then make
adjustments on a port-by-port basis.
Note: Changes in this row are copied to all the ports as soon as you
make them.
Ingress Check If this check box is selected for a port, the Switch discards incoming
frames for VLANs that do not include this port in its member set.
Clear this check box to disable ingress filtering.
PVID A PVID (Port VLAN ID) is a tag that adds to incoming untagged frames
received on a port so that the frames are forwarded to the VLAN group
that the tag defines.
Enter a number between 1and 4094 as the port VLAN ID.
GVRP Select this check box to allow GVRP on this port.
Acceptable
Frame Type
Specify the type of frames allowed on a port. Choices are All, Tag Only
and Untag Only.
Select All from the drop-down list box to accept all untagged or tagged
frames on this port. This is the default setting.
Select Tag Only to accept only tagged frames on this port. All untagged
frames will be dropped.
Select Untag Only to accept only untagged frames on this port. All
tagged frames will be dropped.
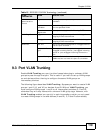
VLAN Trunking Enable VLAN Trunking on ports connected to other switches or routers
(but not ports directly connected to end users) to allow frames
belonging to unknown VLAN groups to pass through the Switch.
Isolation Select this to allows this port to communicate only with the CPU
management port and the ports on which the isolation feature is not
enabled.
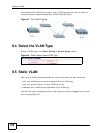
Apply Click Apply to save your changes to the Switch’s run-time memory. The
Switch loses these changes if it is turned off or loses power, so use the
Save link on the top navigation panel to save your changes to the non-
volatile memory when you are done configuring.
Cancel Click Cancel to begin configuring this screen afresh.