


3Com Router 5000 and Router 6000 v2.41
Module Guide
Chapter 1 Overview
1-4
z In case of the possible damage to MIMs, put the MIMs on the Printed Circuit Board (PCB) tray during
the installation and replacement;
z Hold the circuit board by the edge and do not touch the components and the surface of the PCB;
z If you are not planning to install a new MIM/SIC after removing the old one, install a blank filler panel
to keep the chassis dust-free and thereby to ensure the normal ventilation of the Router.
1.5.1 Installing/Removing SIC
I. Tools required
z Flat-blade screwdriver
z ESD-preventive wrist strap and ESD-preventive glove
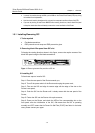
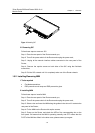
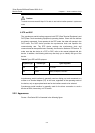
II. Removing blank filler panel from SIC slot
Following the rotating direction shown in this figure, remove the captive screws of the
blank filler panel using the flat-blade screwdriver.
Figure 1-1 Removing the blank filler panel from a SIC slot
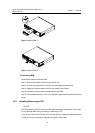
III. Installing SIC
Follow these steps to install a SIC:
Step 1: Place the rear panel of the Router towards you;
Step 2: Turn off the power switch of the Router and unplug the power cord;
Step 3: Take out the SIC and align its remote edge with the edge of the slot on the
Router’s rear panel;
Step 4: Push the SIC into the Router until it closely mates with the rear panel of the
Router;
Step 5: Fasten the SIC into the Router with captive screws;
Step 6: Power on the Router, and check the LEDs of the corresponding slot on the
front panel: after the initialization of the SIC, ON means that the SIC is operating
normally and OFF means that its Power-On Self-Test (POST) has failed. In the latter
case, please contact your agent.