


5-10 LAN Interface Supplement
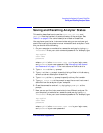
Accessing the Analyzer's Dynamic Data Disk
Copying a Screen Image to a Local File
Copying a Screen Image to a Local File
This section describes how to copy a screen image from the analyzer to a
file on your computer.
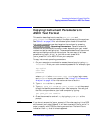
To copy a screen image to your computer
1. On your computer or workstation, access the analyzer by typing ftp
<hostname>. Enter your user name and password. For example, type
ftp my8712
user name
password
where my8712 is the <hostname>, user name is your login name,
and password is your user password. See “Using FTP to Access the
Analyzer” on page 4-3 for instructions on how to do this.
2. Type cd data at the ftp prompt.
3. Type dir at the ftp prompt to see the listing of files in this directory.
4. Type binary or image at the ftp prompt to specify a binary transfer.
5. Decide which screen image file you want to retrieve and then use the
get command to transfer it to your computer. For example, type
get screen.pcx image.pcx to retrieve the current screen image
in PCX format, and place it into a file named image.pcx on your
computer.
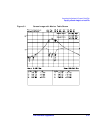
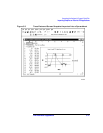
NOTE The appearance of the image you retrieve will depend on the selections in
the Define Hardcopy menu on your analyzer, as well as the file you
choose to retrieve from the data directory. For example, Figure 5-1 was
retrieved with the "screen.hgl" file, using the analyzer's default hardcopy
mode, which includes the measurement graph and the marker table.
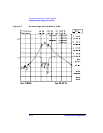
Figure 5-2 was retrieved with the analyzer's hardcopy mode defined as
Graph Only, using the "screen_m.hgl" file. Figure 5-2 also includes the
analyzer’s softkeys. See Table 5-1 on page 5-2 for the filenames of screen
images.