


22 Agilent FrameScope Pro User’s Manual
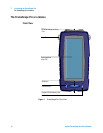
1 Introducing the FrameScope Pro
Getting Started
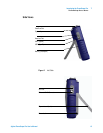
Connecting to the Network and Using the FrameScope Pro
Follow these steps to connect your unit to the network and use
it for testing:
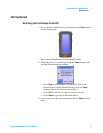
1 Connect the cabling to the FrameScope’s network port.If you
want to perform testing on fiber link, connect the cable on
the SFP port.
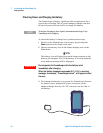
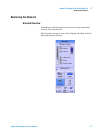
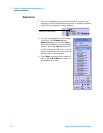
2 You operate the FrameScope using its front panel
touchscreen and control buttons. When testing with the unit,
use the following operating tips:
3 Select items on the display by pressing them with your finger
or with a stylus or by scrolling the highlight bar with the
scroll button. The touch screen may not detect a quick press;
you should press firmly.
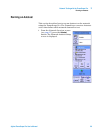
4 Many screens have lists of items that you can navigate using
the Scroll button. Pressing this button up or down moves the
selection highlight.
5 Selected items are highlighted in dark blue to indicate that
they are selected. Most screens have a default selected item.
6 Execute a selected item by pressing it or by pressing the OK
button.
7 To return the Main Menu at any time, press the Main Menu
button on the bottom of the display.
8 To return to the previous screen, press the Back button on
the bottom of the display.
Running a Test
The basic steps for performing a test with the FrameScope Pro
are described below. For more information on network testing,
see Chapter 2, “Network Testing with the FrameScope Pro”.
1 Switch the unit on. Connect power to charge the battery if
necessary. See “Checking Power and Charging the Battery”
on page 20.
2 Connect the FrameScope to the network under test. See
“Connecting to the Network and Using the FrameScope Pro”
on page 22.
3 Choose the type of test you want by pressing the Autotest,
Tools or VoIP Button.
4 Make any needed configuration changes to match your
testing environment.