


Chapter 2: Installation 10
NOTE: To open a virtual media session with a target device, the target device must first be connected to the KVM
switch using a KVM USB VM server module or KVM PS/2 VM server module.
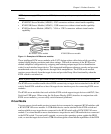
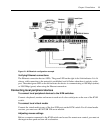
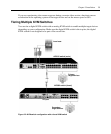
To tier multiple KVM switches:
1. Connect the tiered KVM switch to each target device as described in Connecting the KVM
switch on page 6.
2. Connect the peripheral devices to the local user port on the digital KVM switch. See Verifying
Ethernet connections on page 8.
3. Attach one end of the CAT5 cable to the ACI port on the analog KVM switch.
4. Attach the other end of the CAT5 cable to one of the target device interface ports on the rear of
the digital KVM switch.
5. The switching system automatically merges the two KVM switches. All target devices
connected to the tiered KVM switch are included in the main KVM switch target device list in
the OSD interface. Repeat steps 3 and 4 for all additional tiered KVM switches you attach.
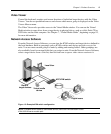
Installing And Starting Up The Web Interface
Once you have installed a new digital KVM switch, you can use the web interface to configure unit
parameters and launch video sessions.
Supported browsers
The web interface supports the following browsers:
• Microsoft Internet Explorer
®
version 6.0 or later
• Mozilla Firefox
®
version 2.0 or later
• Netscape Navigator
®
version 7.0 or later
Launching the web interface
To launch the web interface:
1. Open a web browser and type the IP address of the KVM switch. You can set the IP address of
the KVM switch using the OSD or the serial port.
2. The log in window opens. Type your user name and password and click OK.
3. The web interface opens and displays the Connections tab.
NOTE: Once you have logged in to the web interface, you will not have to log in again when launching new
sessions unless you have logged out or your session has exceeded the inactivity timeout specified by the
administrator.