Installation
Page 2-4
▲ Important! Disconnect all cables from the
IntraSwitch before continuing.
∆ Note: You can install the IntraSwitch in an
equipment rack before installing an expansion
module.
1
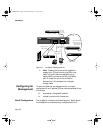
Place the IntraSwitch on a flat, stable surface.
2
Locate a rack-mounting bracket (supplied) and
place it over the mounting holes on one side of
the unit.
3
Insert six screws (supplied) into the holes and
tighten with a Phillips screwdriver.
4
Repeat the two previous steps for the unit’s
other side.
5
Place the unit in the equipment rack.
6
Secure the unit by screwing its mounting brack-
ets to the equipment rack.
▲ Important! Make sure the unit is supported
until all the mounting screws for each bracket
are secured to the equipment rack. Failure to do
so could cause the unit to fall, resulting in per-
sonal injury or damage to the unit, or both.
If you are installing an MII module at this time,
proceed to “Installing MII Modules” on page 2-5.
If you are not installing an MII module at this
time, proceed to “Connecting Power” on
page 2-6.
Free-Standing/
Desktop
Installation
The IntraSwitch has four rubber feet on the bottom of the
chassis that allow for free-standing installation of the unit.
For free-standing/desktop placement:
6216M Book Page 4 Wednesday, January 27, 1999 5:26 PM


