27
E
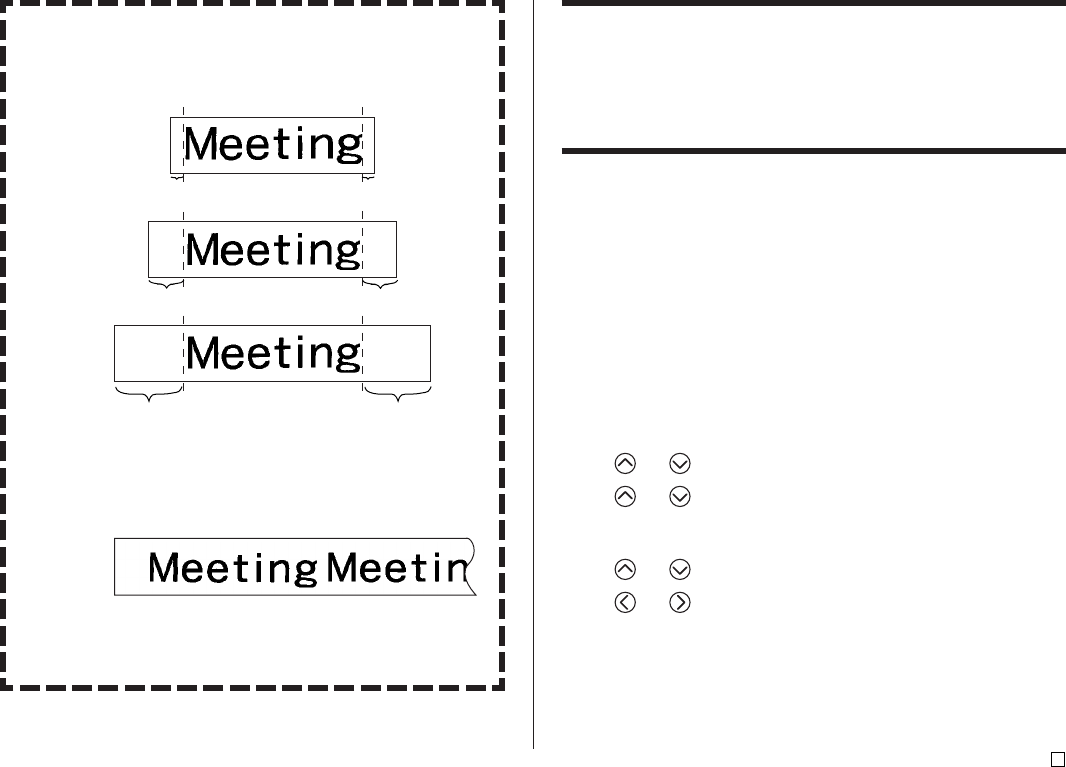
Margins
You can select from among the following four margin settings.
Note
• All of the margin measurements mentioned below are approximate.
NARROW
MEDIUM
WIDE
Important!
• Margins are not cut in the case of short tape lengths 31mm (1 1/4")
for NARROW, 38mm (1 1/2") for MEDIUM, 50mm (1 15/16") for
WIDE). After printing, you can use scissors to trim to the margin you
want.
NONE
• Setting with the NONE setting makes it possible to print consecutive
labels one after another.
• The auto tape cut operation is not performed when NONE is selected
for the margins. To cut the tape, press FUNCTION and then CUT.
3.0mm (1/8")
10mm (3/8")
21.5mm (7/8") 21.5mm (7/8")
FREE DESIGN: Controlling the Length of a Tape
Label
Tape label length is normally adjusted in accordance with the size and number
of the characters in the label. This section explains how you can control the
length of your labels.
There are two different ways to control label length:
• Specifying the length of each block contained in the label (fixed block length);
• Specifying the overall length of the label (fixed tape length).
■ To control label length using fixed block lengths
1. In the Free Design Mode, input the text you want, and divide it into blocks
as required.
• See page 22 for information about blocks.
2. Move the cursor to the block whose length you want to fix.
• The cursor can be located anywhere within the block.
3. Press FORM.
• If your label has only one block, advance directly to step 6 of this
procedure.
4. Use and to select BLOCK FORM, and then press SET.
5. Use and to select ONE BLOCK, and then press SET.
• If you want to apply your setting to all of the blocks in your label, select
ALL BLOCKS instead.
6. Use and to select B-LENGTH.
7. Use and to change the setting to FIX.
3.0mm (1/8")
10mm (3/8")
