


Implementing RIP on Cisco IOS XR Software
How to Implement RIP on Cisco IOS XR Software
RC-339
Cisco IOS XR Routing Configuration Guide
OL-14356-01
Customize RIP
This task describes how to customize RIP for network timing and the acceptance of route entries.
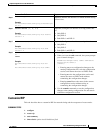
SUMMARY STEPS
1. configure
2. router rip
3. auto-summary
4. timers basic update invalid holddown flush
Step 5
interface type instance
Example:
RP/0/RP0/CPU0:router(config-rip)# interface pos
0/1/0/0
(Optional) Defines the interfaces on which the RIP routing
protocol runs.
Step 6
receive version {1 | 2 | 1 2}
Example:
RP/0/RP0/CPU0:router(config-rip-if)# receive
version 1 2
(Optional) Configures an interface to accept packets that
are:
• Only RIP v1
• Only RIP v2
• Both RIP v1 and RIP v2
Step 7
send version {1 | 2 | 1 2}
Example:
RP/0/RP0/CPU0:router(config-rip-if)# send
version 1 2
(Optional) Configures an interface to send packets that are:
• Only RIP v1
• Only RIP v2
• Both RIP v1 and RIP v2
Step 8
end
or
commit
Example:
RP/0/RP0/CPU0:router(config-rip-if)# end
or
RP/0/RP0/CPU0:router(config-rip-if)# commit
Saves configuration changes.
• When you issue the end command, the system prompts
you to commit changes:
Uncommitted changes found, commit them before
exiting(yes/no/cancel)?
[cancel]:
–
Entering yes saves configuration changes to the
running configuration file, exits the configuration
session, and returns the router to EXEC mode.
–
Entering no exits the configuration session and
returns the router to EXEC mode without
committing the configuration changes.
–
Entering cancel leaves the router in the current
configuration session without exiting or
committing the configuration changes.
• Use the commit command to save the configuration
changes to the running configuration file and remain
within the configuration session.
Command or Action Purpose