


Implementing RIP on Cisco IOS XR Software
Configuration Examples for Implementing RIP on Cisco IOS XR Software
RC-347
Cisco IOS XR Routing Configuration Guide
OL-14356-01
Configuration Examples for Implementing RIP on Cisco IOS XR
Software
This section provides the following configuration examples:
• Configuring a Basic RIP Configuration: Example, page RC-347
• Configuring RIP on the Provider Edge: Example, page RC-348
• Adjusting RIP Timers for each VRF Instance: Example, page RC-348
• Configuring Redistribution for RIP: Example, page RC-349
• Configuring Route Policies for RIP: Example, page RC-349
• Configuring Passive Interfaces and Explicit Neighbors for RIP: Example, page RC-350
• Controlling RIP Routes: Example, page RC-350
Configuring a Basic RIP Configuration: Example
The following example shows two Gigabit Ethernet interfaces configured with RIP.
interface GigabitEthernet0/6/0/0
ipv4 address 172.16.0.1 255.255.255.0
!
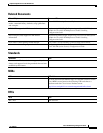
Step 8
route-policy route-policy-name {in | out}
Example:
RP/0/RP0/CPU0:router(config-rip)# route-policy
IN in
Applies a routing policy to updates advertised to or received
from an RIP neighbor.
Step 9
end
or
commit
Example:
RP/0/RP0/CPU0:router(config-rip)# end
or
RP/0/RP0/CPU0:router(config-rip)# commit
Saves configuration changes.
• When you issue the end command, the system prompts
you to commit changes:
Uncommitted changes found, commit them before
exiting(yes/no/cancel)?
[cancel]:
–
Entering yes saves configuration changes to the
running configuration file, exits the configuration
session, and returns the router to EXEC mode.
–
Entering no exits the configuration session and
returns the router to EXEC mode without
committing the configuration changes.
–
Entering cancel leaves the router in the current
configuration session without exiting or
committing the configuration changes.
• Use the commit command to save the configuration
changes to the running configuration file and remain
within the configuration session.
Command or Action Purpose