


Instructions to Configure BFi for Broadcom NIC 47
17
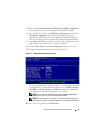
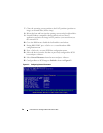
Press <Esc> and <F4> to save and exit from the Broadcom MBA
configuration menu.
NOTE: It is recommended that you save the iSCSI boot configuration to a file
to enable faster recovery if you need to replace the NIC.
18
To save the iSCSI boot configuration to a file:
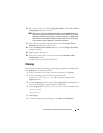
a
Boot your system to a bootable device.
b
Save the configuration to a file using the
ibcfg.exe
program by typing
the following command at the command prompt:
IBCFG -get <FILENAME> -dev <MAC address>
NOTE: It is recommended that you include the NIC number in the file name.
For example, to name the iSCSI boot configuration file of the NIC-enabled for
iSCSI boot, use the following command where 00:18:8B:FD:F9:1A is the MAC
address of the iSCSI boot NIC.
IBCFG -get dell1 –dev 00:18:8B:FD:F9:1A
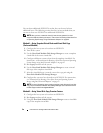
Preparing the Host and Operating System Boot Image
1
In the host’s BIOS, confirm that the boot order lists the Broadcom
Embedded NIC 1 before the local hard drive.
2
Press <Esc> twice and select
Save changes and exit
to exit from BIOS.
3
BIOS reboots the system and boot into the operating system in local hard
drive.
4
Log in to the operating system. Open the
Disk Management
Console and
verify that the iSCSI LUN is recognized.
NOTE: It is strongly recommended that you do not login to the iSCSI target
manually. The iSCSI Software Initiator automatically retrieves the iSCSI boot
configuration from the Intel PRO/1000 adapter iSCSI Boot firmware. If you
manually add connections in the initiator with the same paths as configured in
the iSCSI boot firmware, the system may hang, display a blue screen or reboot
during failover.
5
Create a new FAT32 partition on the local hard drive using the disk
management console.
NOTE: You can skip step 5 if you have saved the image to a network share.
6
Boot to a bootable device such as a diskette drive, media, or USB key and
run a disk imaging software such as Symantec Ghost.