Dell
TM
XFR D630 Fully Rugged Notebook Service Manual
Page 7 of 106 Revision A01
itself. Some cables have a connector with locking tabs; if you are disconnecting this type of cable,
press in on the locking tabs before you disconnect the cable. As you pull connectors apart, keep
them evenly aligned to avoid bending any connector pins. Also, before you connect a cable,
ensure that both connectors are correctly oriented and aligned.
NOTICE: To avoid damaging the computer, perform the following steps before you begin working
inside the computer.
1. Ensure that the work surface is flat and clean to prevent the computer cover from being
scratched.
2. Turn off your computer (see
95H
Turning Off Your Computer
).
NOTICE: To disconnect a network cable, first unplug the cable from your computer and then
unplug it from the network device.
3. Disconnect any telephone, network. And USB cables from the computer.
4. Disconnect your computer and all attached devices from their electrical outlets.
5. Turn over the computer.
NOTICE: To avoid damaging the system board, you must remove the main battery before you
service the computer.
6. Remove the battery.
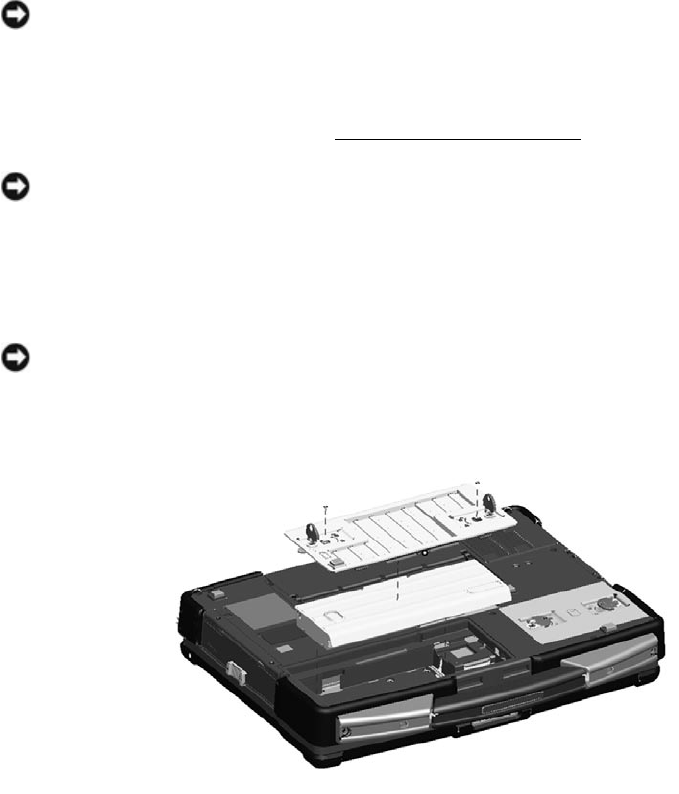
a. If the 2 screws that secure the quarter-turn latches are installed, remove the 2 screws
on the latches on the battery compartment using a #1 Philips screw driver. See the
figure above for the location of the battery compartment. If the 2 security screws are
not installed, proceed to step b.
b. Lift each latch and turn each a quarter-turn, toward the ‘unlock’ icon, to release the
latching mechanism. Remove the compartment cover from the computer.
c. To remove the battery from the compartment, utilize the tab on the battery to assist
in lifting the battery from the compartment.
7. Press the power button to ground the system board.
8. Remove any PC Card or ExpressCard, if installed, from the PC Card slot.
a. The PC Card slot is located on the left, front side of the notebook.
b. To access the PC Card or ExpressCard, lower the protective door.


