


10
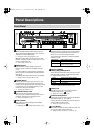
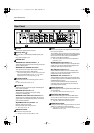
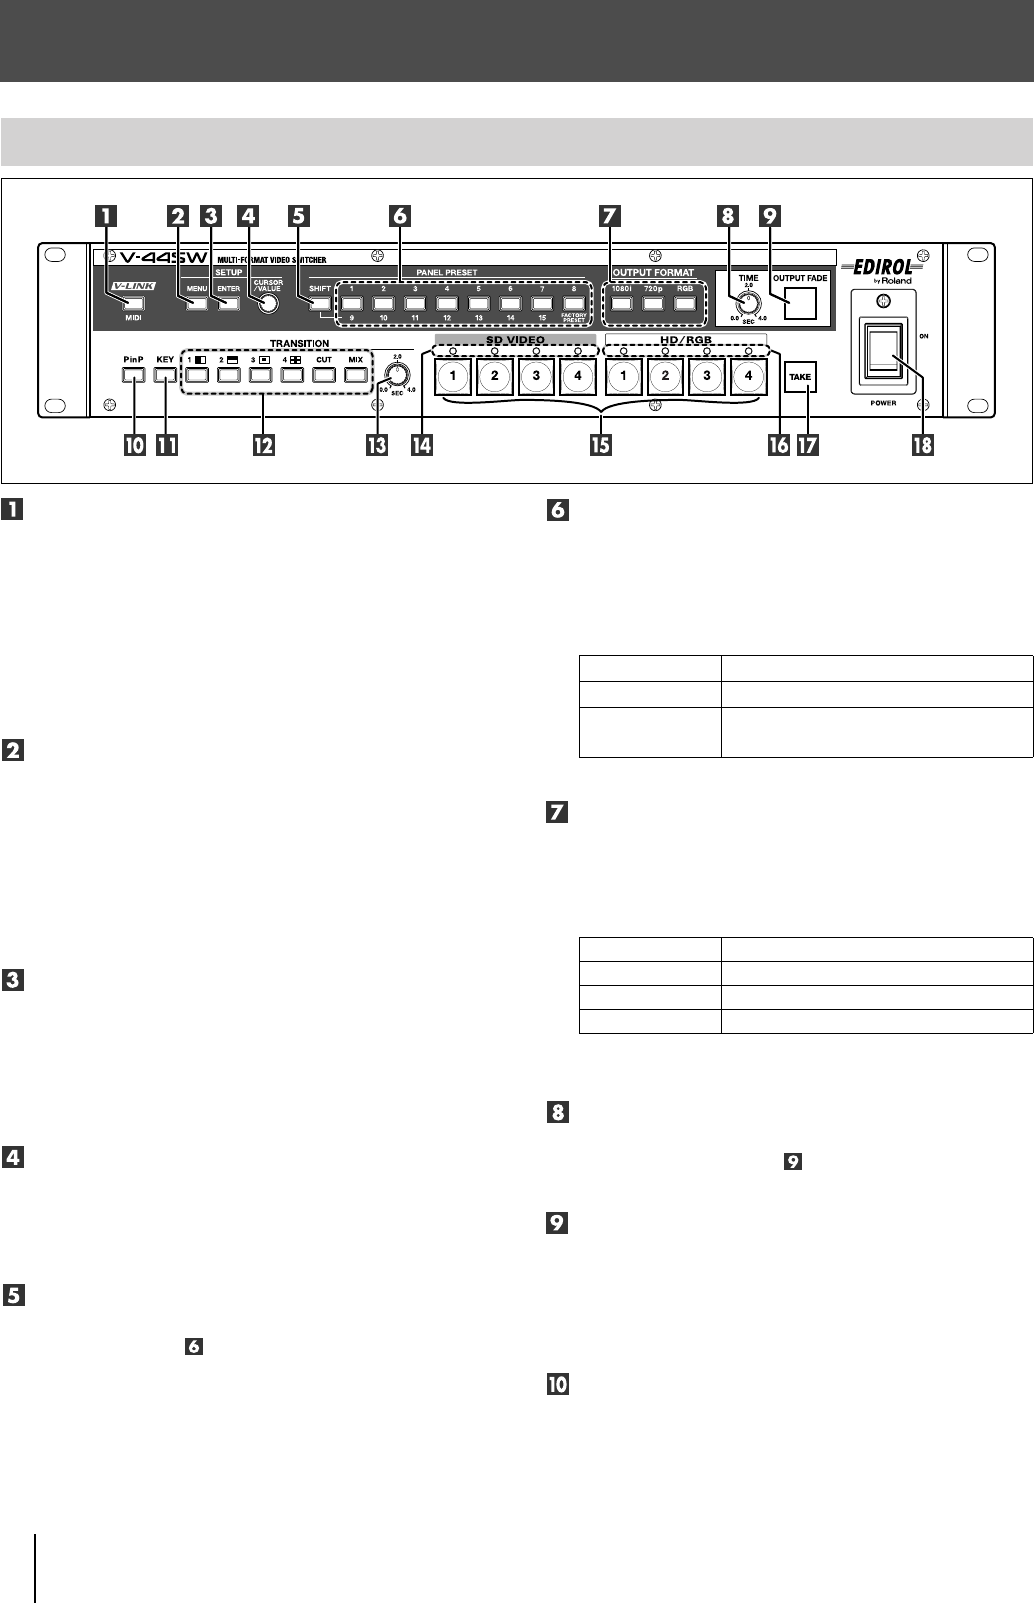
Panel Descriptions
[MIDI] Button
●
This switches reception of MIDI signals on and off.
When switched off, the [MIDI] button is unlit, and the V-
44SW does not receive MIDI signals.
☞
“Temporarily Cutting Linked Operation” (p. 46)
●
When the [MIDI] button’s function is set to “V-LINK
Indicator,” the button is lit when V-LINK mode is on, and
off when V-LINK mode is off.
☞
“Control Using V-LINK” (p. 48)
[MENU] Button
Press this button to display the Main menu in the
television monitor connected to the MENU connector
(p. 12).
If you have shifted to a lower level menu, pressing this
takes you back to the immediately preceding menu (the
level above).
The [MENU] button flashes while the menu is displayed.
☞
“Setting the Various Functions (Menu)” (p. 26)
[ENTER] Button
Pressing this button confirms your choice of the menu
parameter that’s currently selected and advances the
screen to the next (lower level) menu. This is also pressed
to respond with “Yes” to messages appearing on the
screen when using menu operations.
☞
“Working with the Menus” (p. 27)
[CURSOR/VALUE] Knob
This moves the cursor appearing in the menu.
When the cursor is located at the value set for a menu
parameter, rotating the knob changes the value.
☞
“Working with the Menus” (p. 27)
[SHIFT] Button
This switches the functions assigned to the PANEL
PRESET buttons ( ).
☞
“Registering Often-Used Settings (Panel Presets)” (p. 42)
PANEL PRESET Buttons
Use these buttons to register and call up button settings,
settings for other special effects such as the Picture in
Picture (P in P), and other settings as presets.
The presets change depending on whether the [SHIFT]
button is lit or unlit.
☞
“Registering Often-Used Settings (Panel Presets)” (p. 42)
OUTPUT FORMAT
[1080i] [720p] [RGB] Buttons
These select the format of the video output from the HD/
RGB OUT PGM connectors. The selected button lights.
☞
“Setting the Output Format” (p. 30)
* You can change the output formats selectable with these
buttons.
☞
“Changing the Output Format” (p. 30)
[TIME] Knob
This sets the time for the video to fade out after the
[OUTPUT FADE] button ( ) is pressed.
☞
“Fading Out the Final Output” (p. 28)
[OUTPUT FADE] Button
Pressing this causes the video output from the HD/RGB
OUT PGM connector (p. 12) to fade out.
Pressing the [OUTPUT FADE] button after the video has
faded out fades the video in again.
☞
“Fading Out the Final Output” (p. 28)
[P in P] Button
This switches the Picture in Picture effect on and off. The
[P in P] button lights when the effect is on.
☞
“Adding the Picture in Picture (P in P) Effect” (p. 39)
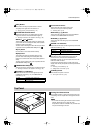
Front Panel
[SHIFT] Button
PANEL PRESET Buttons
Off
Register and call up Presets 1–8
Lit
Register and call up Presets 9–15
Calls up the factory presets
Button
Output Format (Factory Setting)
[1080i]
1080/60i
[720p]
720/60p
[RGB]
1024x768/60
V-44SW_e.book 10 ページ 2006年10月23日 月曜日 午後3時25分