41
Adding Effects to the Video
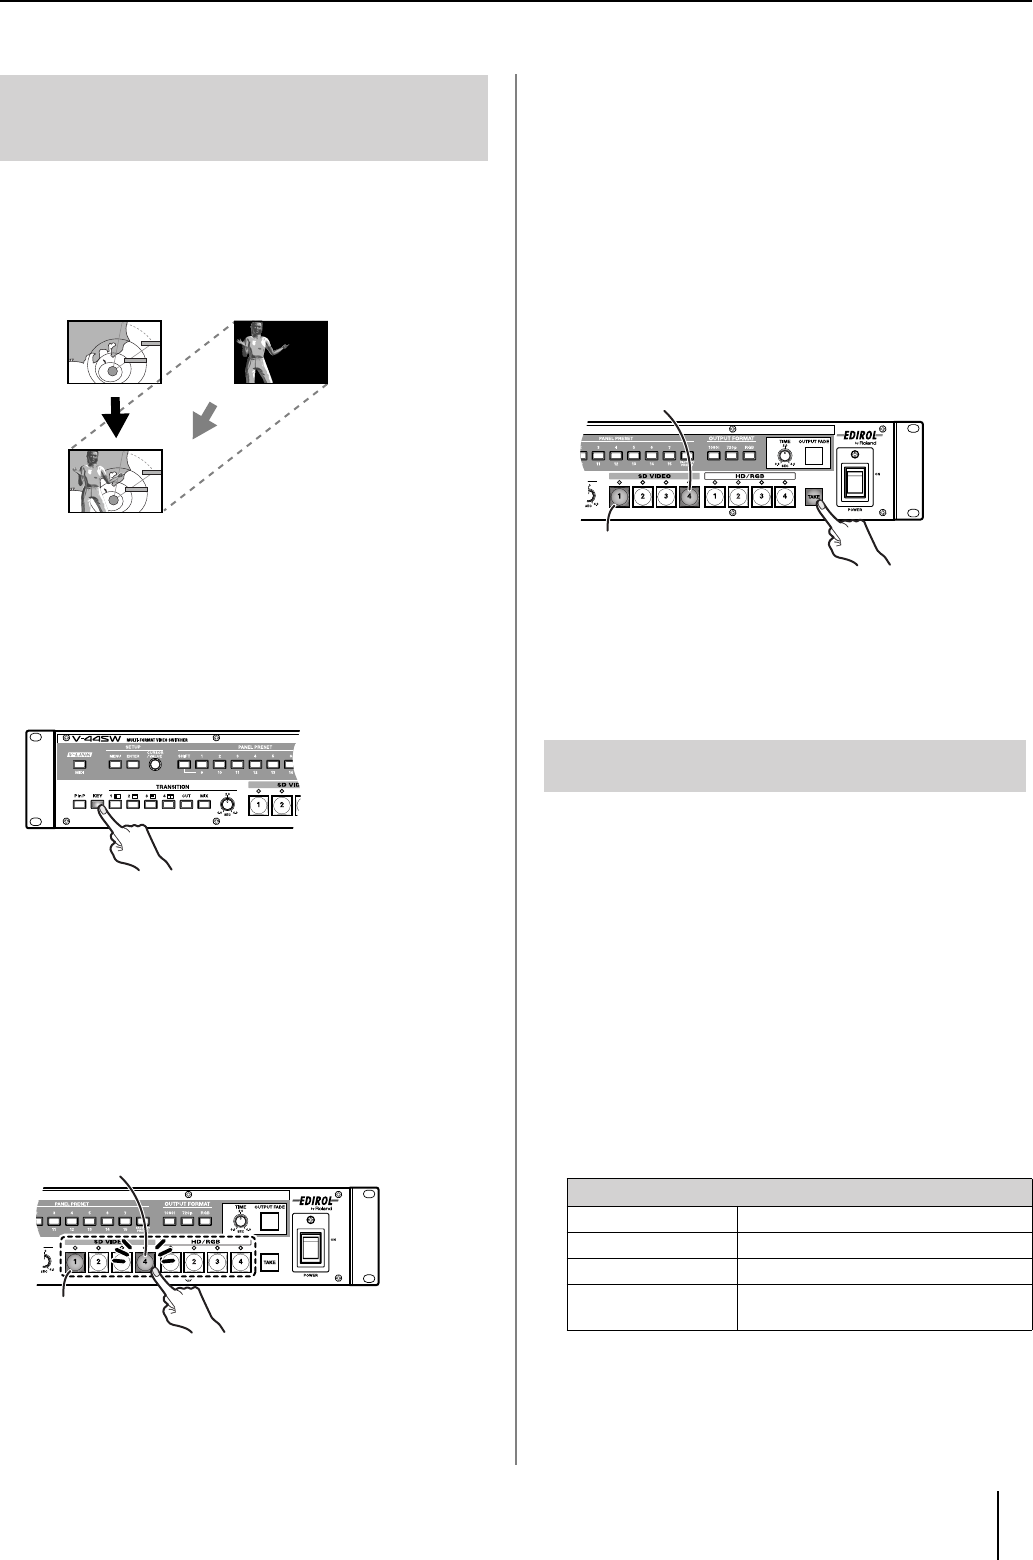
With this effect, the portions matching the key color in the
video on the channel to which the key composite effect is
applied are made transparent, and the video on the other
channel is composited as shown in the figure below.
1
Output the video to be used as the background screen.
The corresponding channel select button lights in yellow.
2
Press the [KEY] button.
The [KEY] button lights up, and the Key Composite effect is
switched on.
●
Pressing the [KEY] button once more at this time switches off the
Key Composite effect.
3
Press one of the SD VIDEO buttons [1]–[4] or the
HD/RGB buttons [1]–[4] to select the key composite
input video.
The selected button flashes in green, and the input video
appears in the preview monitor connected to the HD/RGB
OUT PREVIEW connector.
●
The Key Composite effect is not applied at this stage. Select the
key composite video while checking the video being previewed.
4
Once you decide on the video to use as the key
composite video, press the [TAKE] button.
The Key Composite effect is switched on, and the video on
the channel selected in Step 3 is placed in the sub-screen
and output as the final output video.
●
The key composite video is alternately displayed and hidden each
time the [TAKE] button is pressed. The [TAKE] button lights while
the key composite video is displayed.
●
While the key composite video is being displayed, you can switch
the video to be used as the key composite video just by pressing
the channel select buttons.
●
When the P in P effect (p. 39) is in use, the key composite effect
is applied to the P in P sub-screen.
☞
For more on setting the key type, key level, and other Key
Composite settings, refer to “Advanced Key Composite Settings.”
●
You can change the colors in which channel select buttons light.
For more detailed information, refer to the column “About the
Colors of Channel Select Buttons” (p. 36).
When the Key Composite effect is switched off while the key
composite video is being displayed, the video on the channel
being composited is made the final output video.
If you do not want to switch the final output video, first press
the [TAKE] button to hide the key composite video, then switch
off the Key Composite effect.
■
Advanced Key Composite Settings
Use these procedures to adjust the key type, key level, and
other settings.
1
Press the [MENU] button to display the Main menu.
2
Select “5. Key” to display the sub-menu.
You can make changes to the following parameters.
●
You can register the Key Composite settings in the presets,
making it simple to call up these settings later on. For more
detailed information, refer to “Registering Often-Used Settings
(Panel Presets)” (p. 42).
Applying the Key Composite
Effect
Composited with black portions
of the video (the key) removed.
Background screen Key Composite Video
Flashing (Green) (Key composite video:
currently previewing)
Lit (Yellow)
(Background screen)
About the Final Output When the Key Composite
Effect is Off
5. Key Sub Menu (
☞
p. 56)
1: Key Type
Key Type
2: Key Level Key level
3: Key Soft Edge Key soft edge level
4: Key Reset The sub-menu settings are returned to
their factory default settings (
☞
p. 29).
Lit (Yellow) (Background screen)
Lit (Green) (Key composite video:
currently outputting final video)
V-44SW_e.book 41 ページ 2006年10月23日 月曜日 午後3時25分


