37
Switching Video
●
Immediately after the power is turned on, SD VIDEO Channel 1 is
assigned as the final output.
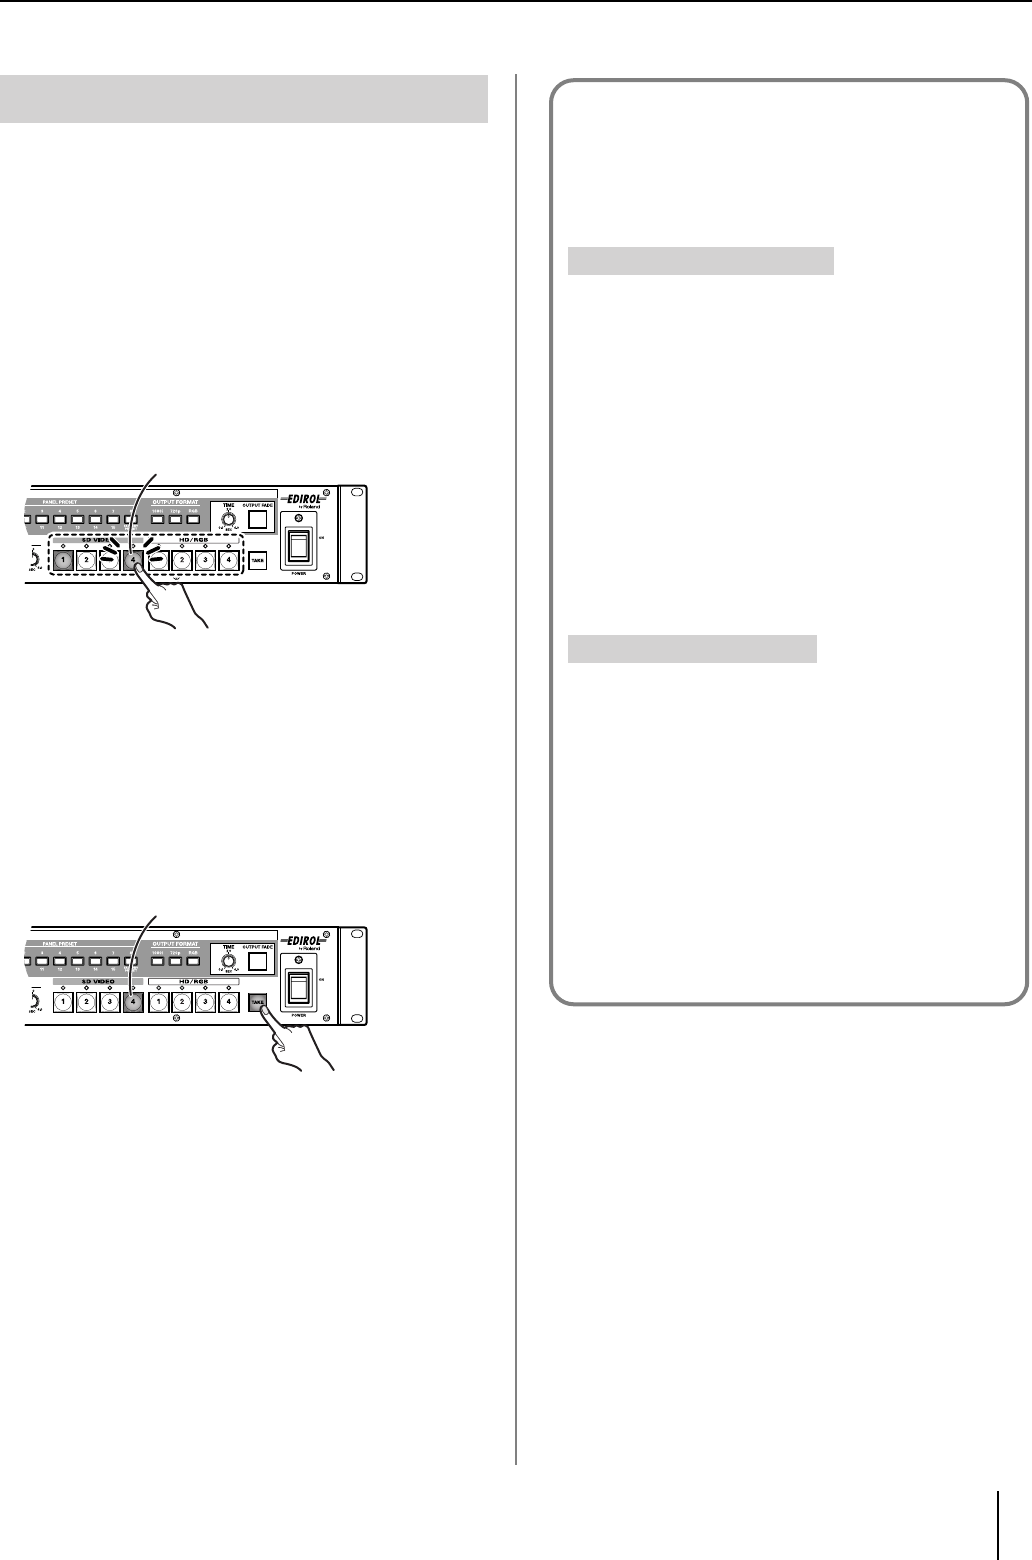
1
Press one of the SD VIDEO buttons [1]–[4] or one of
the HD/RGB buttons [1]–[4] to select the channel.
The selected button flashes, and the input video appears in
the preview monitor connected to the HD/RGB OUT
PREVIEW connector.
●
The final output video is not switched at this stage. Select the
video you want to use as the final output while checking the video
being input.
●
The channel select button corresponding to the previewed video
flashes.
●
Selecting an HD/RGB channel to which no signals are input may
result in delayed switching of the video.
2
Once you decide to use the video, press the [TAKE]
button.
The video shown in the preview monitor is output as the
final output video, and this video appears in the display
connected to the HD/RGB OUT PGM connector.
●
The channel select button for the video output as the final output
video remains lit.
3
Repeat Steps 1 and 2 to switch the video images.
Switching in Preset Mode
Flashing
Stops flashing and remains lit.
To Prevent Errors in Using the Channel Select
Buttons
You can disable the operation of channel select buttons
you are not using. This is useful in preventing accidental
output of video.
1 Press the [MENU] button to display the Main
menu.
2 Select “2. SD Input” and select “1: SD Ch1” – “4:
SD Ch4” from the sub-menu to specify the
channel you want to set.
3 Select “6: SD Sw Enable” from the SD Ch sub-
menu.
4 Set this to “Off.”
Once set, the button will not function even when
pressed.
1 Press the [MENU] button to display the Main
menu.
2 Select “3. HD/RGB Input” and select “2: HD/RGB
Ch1” – “5: HD/RGB Ch4” from the sub-menu to
specify the channel you want to set.
3 Select “18: Sw Enable” from the HD/RGB Ch sub-
menu.
4 Set this to “Off.”
Once set, the button will not function even when
pressed.
SD VIDEO Buttons [1]–[4]
HD/RGB Buttons [1]–[4]
V-44SW_e.book 37 ページ 2006年10月23日 月曜日 午後3時25分
