


68 ProLink
®
II Software for Micro Motion
®
Transmitters
Meter Verification
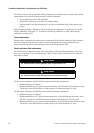
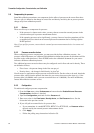
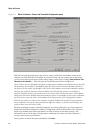
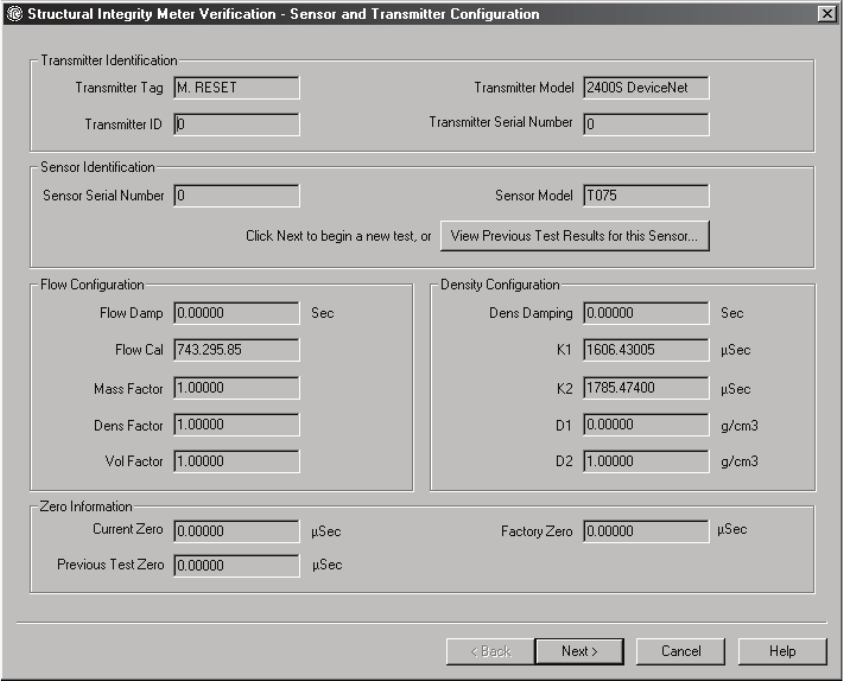
Figure 6-1 Meter Verification - Sensor and Transmitter Configuration panel
ProLink II records the results of previous tests in a meter verification test database stored on the
computer on which ProLink II is installed. If you have already run one or more tests on this meter,
you can review those previous test results before starting a new test by clicking
View Previous Test
Results for this Sensor ...
. This will open the Test Results panel shown in Figure 6-4.
Notes: Test records are identified in the meter verification test database by transmitter/sensor pair. For
the transmitter, the identifier is the HART Unique ID, which is entered in the transmitter memory at
the factory. For the sensor, the identifier is the sensor serial number stored in the transmitter memory.
Previous test results for the meter will be available only if the pairing of these two identifiers is
identical. Therefore, before you run the first test on a meter, make sure that the sensor serial number
displayed in the Sensor Identification box matches the sensor serial number on the sensor calibration
tag. If necessary, enter the sensor serial number in the Sensor panel of the Configuration window.
Previous test results are stored on the computer on which ProLink II is installed. If you performed
meter verification tests on the same meter from a different computer or from the meter display, the
results of these tests will not be visible.
The Structural Integrity meter verification method is not directly affected by any of the parameters
displayed in the Flow Configuration, Density Configuration and Zero Information boxes. However,
because any modification of these parameters can have an impact on the meter accuracy, this
information can be useful when reviewing meter verification test results to decide if the meter’s
accuracy meets factory specifications.
Once you have reviewed the meter information, click
Next.