70 ProLink
®
II Software for Micro Motion
®
Transmitters
Meter Verification
Specification Uncertainty Limit
The result of the meter verification test will be a percent uncertainty of normalized tube stiffness. The
default limit for this uncertainty is ±4.0%. This limit is stored in the transmitter, and can be changed
with ProLink II if necessary by clicking the arrow in the
Specification Uncertainty Limit box and
selecting a value between 0.1 and 5 %. For most installations, it is advisable to leave the test limits at
the default value.
During meter commissioning, Micro Motion recommends performing meter verification several times
over a range of process conditions. This will establish a baseline for how widely the verification
measurement varies under normal circumstances. The range of process conditions should include
expected temperature, pressure, density, and flow rate variations. The default stiffness specification
uncertainty limit of ±4.0% should avoid false Fail results over the entire range of specified process
conditions. If the process variation observed during your meter commissioning is much different than
4%, you may adjust the specification limit to match your process variation. In general, to avoid false
Fail results, make sure that the specification limits are set to a value around twice the variation due to
the range of normal process conditions.
Once you have entered the necessary information and checked the uncertainty limit, click on
Next.
6.2.3 Third panel: Start
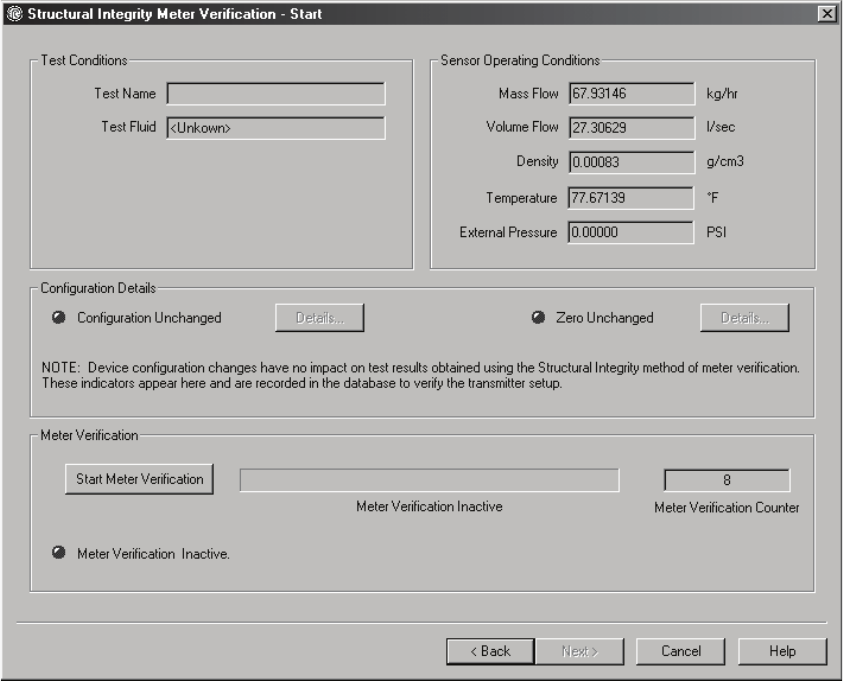
The Start panel, shown in Figure 6-3, allows you to initiate and monitor the meter verification
process.
Figure 6-3 Meter Verification - Start panel


